
Your Crash Course On Eyebrow Shaping And Filling Techniques

Well-shaped eyebrows can make a noticeable difference to the appearance of the face. They can frame the eyes, create definition, and make everyday makeup look more polished. All you need is the right set of eyebrow products; achieving natural-looking brows does not require a complicated routine or professional-level skills.
For beginners, the key is understanding the natural brow structure, removing only unnecessary hairs, choosing the right products, and learning how to apply them with a light hand. The right eyebrow makeup technique can enhance sparse areas without making the brows look drawn on or overly dramatic.
This complete guide by Beauty Depot Online explains eyebrow shaping, filling, trimming, product selection, colour matching, maintenance, common mistakes, and safety considerations so beginners can confidently create balanced, natural-looking brows at home.
What Is Eyebrow Shaping and Filling?
Eyebrow shaping is the process of refining the natural outline of the brows by removing or trimming unwanted hairs. Tweezing, threading, and waxing are common methods, while small brow scissors can be used to control particularly long hairs.
Eyebrow filling is different. Instead of removing hair, it involves using products such as pencils, powders, pens, pomades, or tinted gels to add the appearance of density where the brows are sparse.
The two techniques work together. Eyebrow shaping establishes the structure, while filling enhances areas where natural hair may be uneven or less dense.
The goal is not to create identical eyebrows. Natural facial features are rarely perfectly symmetrical. A better objective is to create brows that look balanced together and complement the person's existing features.
Why Understanding Your Natural Brow Matters
Before using tweezers or makeup, take a moment to examine the natural eyebrows.
Every brow has several key areas:
-
Brow head - The section closest to the nose
-
Brow body - The fuller central portion
-
Arch - The highest point of the brow
-
Tail - The outer end
-
Natural thickness - How dense or sparse the hair is
-
Growth direction - The direction in which individual hairs naturally grow
The natural structure should be the starting point for shaping. Trying to completely change the brow's original form can result in excessive hair removal and an unnatural appearance.
Eyebrow hair also has its own growth characteristics. A review published in the Journal of Drugs in Dermatology notes that eyebrow follicles have a shorter growth phase than scalp hair, which is one reason eyebrow hair behaves differently from the hair on the head.
That makes a conservative approach particularly useful for beginners.
How to Map Your Eyebrows Before Shaping
Brow mapping provides a simple framework for identifying the approximate beginning, arch, and tail of each eyebrow.
You can use a thin makeup brush or eyebrow pencil as a straightedge.
Find the Brow Head
Hold the pencil vertically along the side of the nose. The point where it meets the brow gives you a useful starting reference.
This does not mean every person should have an identical brow placement. Natural facial proportions differ, so use the measurement as a guide rather than a strict rule.
Avoid removing too much hair from the inner brow. Over-plucking this area can make the eyebrows appear unusually far apart.
Find the Arch
Look straight ahead and position the pencil from the outer edge of the nose toward the outer portion of the iris.
Where the guide meets the eyebrow can help identify the approximate location of the arch.
If the natural eyebrow is relatively straight, there is no need to create a dramatic peak. A subtle arch can look more harmonious with the existing brow.
Find the Tail
Place the pencil diagonally from the side of the nose toward the outer corner of the eye.
Where the pencil meets the brow provides a useful reference for the approximate tail position.
Remember that this is a guideline, not a mathematical requirement. The ideal eyebrow shape depends on natural hair growth, facial proportions, and personal preference.
How to Prepare Before Shaping
Proper hygiene and preparation prevent skin irritation, ingrown hairs, and uneven lines.
Before starting:
-
Cleanse thoroughly - Wash away face oils, sunscreen, and lingering cosmetics.
-
Comb the canvas - Brush brow hairs straight upward with a clean spoolie brush to inspect actual root growth.
-
Optimize your environment - Use bright, ambient daylight rather than a single harsh spotlight.
-
Ditch the high-magnification mirrors - Looking into 10x magnification causes over-plucking because you lose sight of your overall facial symmetry.
-
Sanitize tools - Wipe stainless-steel tweezers and trimming shears with isopropyl alcohol.
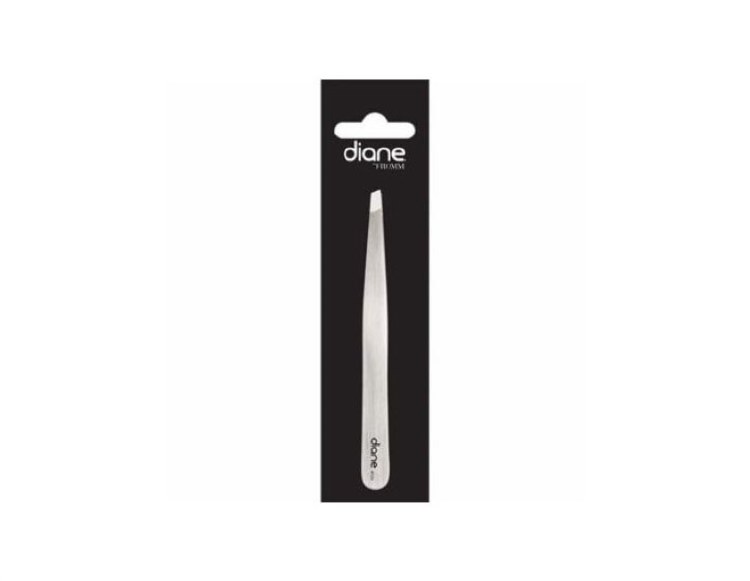
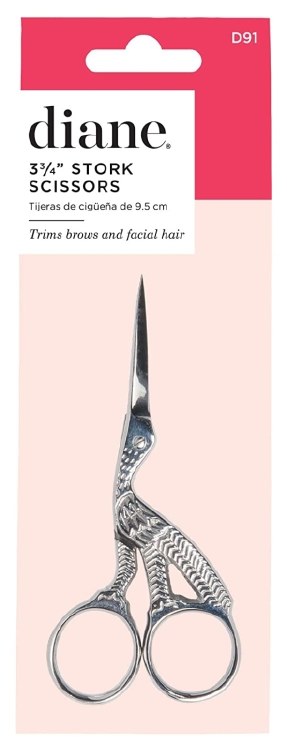
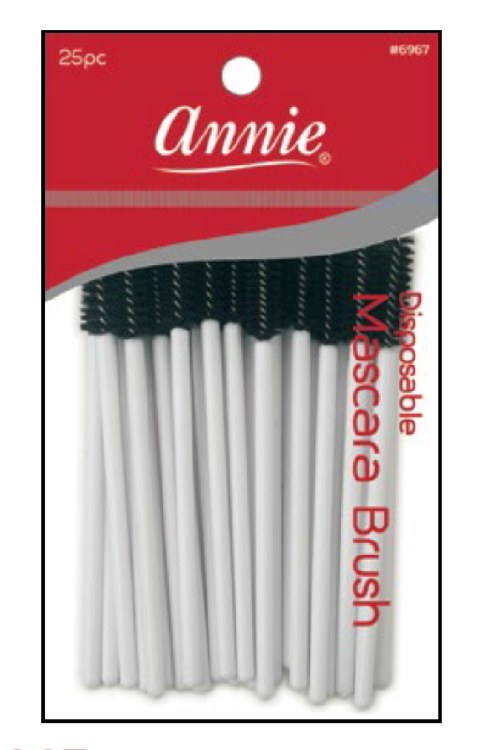
Great brows start with the right tools. Upgrade your kit with our Diane Slanted Tweezers for painless plucking, and the Diane Stork Scissors for Eyebrows for clean, sharp lines. Don't forget a pack of Annie Disposable Mascara Brushes to keep your canvas brushed and ready.
Avoid shaping eyebrows when the surrounding skin is irritated, sunburned, inflamed, or otherwise sensitive.
Clean tools are particularly important around the eye area. The U.S. Food and Drug Administration advises consumers to wash their hands before using eye cosmetics and to make sure instruments used around the eyes are clean.
For additional guidance, see the FDA's Eye Cosmetic Safety information.
Eyebrow Shaping Techniques for Beginners
There are several ways to refine eyebrows. The best option depends on how much hair needs to be removed and how comfortable you are with each method.
Tweezing
Tweezing is one of the easiest methods for beginners because individual hairs can be removed selectively.
Brush the hairs upward first and identify obvious stray hairs, especially:
-
Below the natural brow line
-
Between the eyebrows
-
Around the lower tail
-
A few hairs that clearly fall outside the desired shape
When tweezing, hold the skin gently and pull the hair in the direction it grows.
Do not rush. Remove one or two hairs, step back, and look at the overall result before continuing.
Trimming
Trimming is useful when brow hairs are unusually long rather than unwanted.
Brush the hairs upward and identify the strands that extend significantly beyond the natural shape. Using small eyebrow scissors, carefully trim only the tips.
Then brush the hairs back into their normal position and reassess.
A common beginner mistake is cutting every hair to the same length. This can make the brows look unnaturally short or sparse.
Threading
Threading removes multiple hairs at once and can create a clean outline. It is often performed professionally because controlling the thread and maintaining symmetry can take practice.
For beginners, professional threading can be a practical choice when a more defined shape is desired without attempting the technique independently.
Waxing
Waxing can quickly remove several hairs and create a defined appearance. However, it is less forgiving if too much hair is removed.
Because eyebrow skin is close to the eyes and can be delicate, beginners should be cautious and consider professional waxing if they are inexperienced.
Why Less Is More When Shaping Eyebrows
One of the most important beginner rules is simple:
Do not remove more hair than necessary.
It is easy to become focused on small differences while looking closely at one eyebrow. A few additional hairs may seem insignificant, but repeated removal can dramatically change the overall shape.
Instead of trying to make both brows exactly identical, ask:
Do the eyebrows look balanced together?
One brow may naturally sit slightly higher. Another may have a slightly different arch or contain more hair.
Trying to correct every small difference can result in over-plucking both brows.
How to Choose Products for Filling Eyebrows
Once the basic shape is established, makeup can be used to enhance sparse areas. Common products include:
|
Product |
Best For |
Typical Finish |
|
Brow pencil |
Beginners and precise filling |
Natural |
|
Brow powder |
Soft, fuller brows |
Soft |
|
Brow pomade |
Strong definition |
Bold |
|
Brow pen |
Hair-like strokes |
Natural |
|
Tinted brow gel |
Fast everyday application |
Soft/full |
|
Clear brow gel |
Holding hairs in place |
Natural |
For someone learning eyebrow makeup for the first time, a fine-tipped brow pencil and spoolie are usually enough. Try the Absolute Dramatic Eyebrow Pencil for foolproof, hair-like strokes.
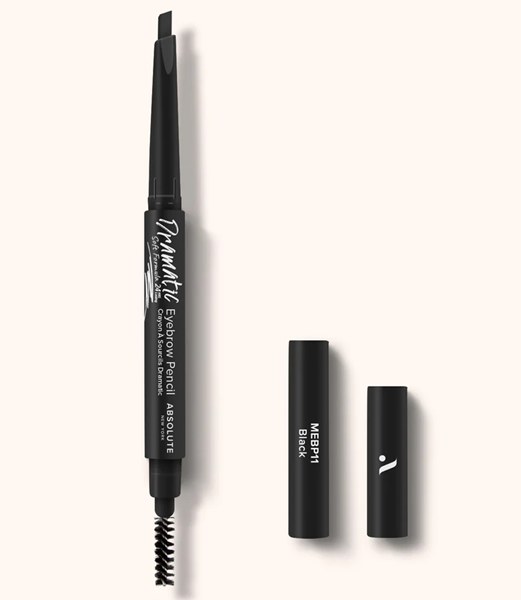
A pencil allows better control over the amount of pigment, while the spoolie helps soften and distribute the product.
How to Choose the Right Brow Color
The eyebrow product does not always need to perfectly match the hair color.
A natural-looking choice may be:
-
Blonde hair - Taupe or light brown
-
Light brown hair - Soft brown
-
Medium brown hair - Medium or neutral brown
-
Dark brown hair - Dark brown
-
Black hair - Deep brown or soft black
Avoid automatically choosing the darkest available shade.
A color that is too dark can make the brows look heavy, particularly when a beginner applies too much product.
When uncertain, choosing a slightly lighter shade is often easier to work with. More product can be added gradually, while correcting overly dark brows takes more effort. Selecting correct formulas tailored to your skill level and natural density ensures seamless eyebrow makeup application:
|
Product Type |
Ideal For |
Finish |
Skill Level |
|
Micro Fine Pencil |
Precise filling, targeted gap coverage, adding micro-strokes |
Natural / Matte |
Beginner Friendly |
|
Brow Powder |
Diffusing soft shadow under thin brows, adding bulk |
Soft / Muted Matte |
Beginner Friendly |
|
Brow Pomade |
Clean edges, full structural reconstruction, dramatic looks |
Bold / Sculpted |
Intermediate to Advanced |
|
Micro-Stroke Pen |
Drawing hyper-realistic, fine hair strands |
Ultra-Detailed |
Intermediate |
|
Tinted Brow Gel |
Instant color, fast volume, quick daily routines |
Soft / Natural |
Ultimate Beginner |
|
Clear Brow Gel |
Setting rebellious brow strands in place all day |
Invisible Hold |
Everyone |
How to Fill in Eyebrows Naturally
Learning how to properly fill in eyebrows requires strategic product placement rather than blocking out the entire shape with solid pigment. The goal of filling is not to colour the entire brow with a solid layer of product.
Instead, imitate the appearance of natural hairs.
Step 1 - Brush the Brows
Use a clean spoolie to brush the hairs upward and outward.
This reveals sparse areas and shows where additional product is actually needed.
Step 2 - Identify the Gaps
Look for visible spaces between hairs.
Do not automatically fill every part of the eyebrow. Areas that already have sufficient natural hair may require little or no product.
Step 3 - Start Around the Middle
Use a fine brow pencil or pen to create light strokes through the body of the brow.
Keep the pressure gentle.
Step 4 - Add Definition Around the Arch
If the arch looks sparse, add a few small strokes that follow the existing hair direction.
Avoid creating a sharply drawn line unless a dramatic makeup style is specifically desired.
Step 5 - Define the Tail
The tail can generally be slightly more defined than the brow head.
Use smaller strokes as you approach the end.
Step 6 - Keep the Front Soft
Use very little product at the brow head.
The front of the eyebrow generally looks more natural when it is softly blended instead of heavily filled.
Step 7 - Brush Through Again
Use a spoolie to blend the product through the hairs.
This final step can soften harsh lines and distribute excess pigment.
The Hair-Stroke Technique
The hair-stroke technique is one of the most useful skills for beginners.
Instead of drawing a continuous line, make short strokes that resemble individual hairs.
Think:
Small stroke + small gap + small stroke
rather than:
One solid line
Follow the natural direction of the existing brow hairs.
At the front, strokes can generally be more vertical. Through the middle, they can become more diagonal. Near the tail, follow the direction of the existing hairs.
Keep the pressure light.
Several small strokes usually create a more realistic result than one heavy application.
This technique is particularly useful when learning how to fill in eyebrows without making them look overly made-up.
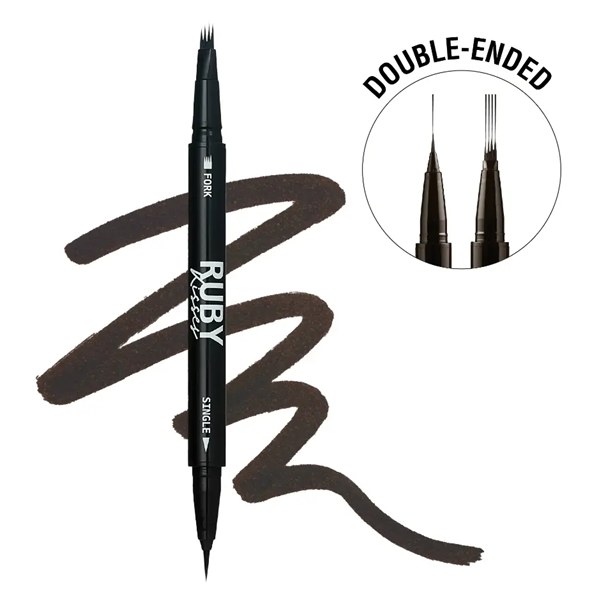
To master the hair-stroke technique, you need a tool with an ultra-fine tip. The Ruby Kisses Duo Microblading Tattoo Eyebrow Pencil from Beauty Depot Online deposits sheer, buildable pigment that perfectly mimics natural hair, making it virtually impossible to overdo.
How to Create a Soft Brow Head
A dark, square-shaped brow head is one of the most noticeable signs of heavy beginner application.
To keep the front natural:
-
Use very little product.
-
Create tiny strokes.
-
Brush the hairs upward.
-
Concentrate more pigment toward the middle.
-
Blend the front with a spoolie.
-
Check the result from a normal viewing distance.
A useful principle is:
Soft front → defined middle → slightly sharper tail
This creates structure without making the brow look like a solid block.
How to Use Brow Gel
Brow gel can be used after pencil, powder, or pen to hold the hairs in place.
Clear Brow Gel
Clear gel is useful when you want to maintain the natural color of the brows while controlling the hair direction.
Tinted Brow Gel
Tinted gel can add a small amount of color and fullness while helping keep the hairs in place.
Apply a small amount and brush the hairs upward and outward or in the direction that best suits their natural growth.
Avoid loading too much product onto the spoolie. Excess gel can make the brows stiff, shiny, or clumpy.
A Simple Three-Product Beginner Routine
A beginner does not need a large collection of brow products.
Start with:
1. Spoolie
Use it to brush and blend the brows.
2. Fine Brow Pencil
Use it to fill visible gaps with light, hair-like strokes.
3. Clear or Tinted Brow Gel
Use it to hold the finished shape.
This simple combination can create polished everyday brows without requiring complicated techniques.
If you are building your overall makeup collection, an eye makeup guide can help with other products and techniques around the eyes, while a first makeup kit guide can help beginners decide which basic products to purchase.
Common Eyebrow Mistakes to Avoid
Over-Plucking
Removing too much hair can change the natural brow structure and leave sparse areas that require makeup to disguise.
Making the Brows Too Dark
Heavy pigment can make the eyebrows dominate the face.
Start with less product and build gradually.
Drawing a Solid Outline
A complete dark outline around the brow can create an artificial appearance.
Use small strokes instead.
Making the Brow Head Too Square
The inner brow generally benefits from softer application and more blending.
Creating an Extremely High Arch
A dramatic arch does not suit every natural brow.
Work with the existing structure instead of forcing a completely different shape.
Making the Tail Too Long
Extending the tail significantly beyond the natural shape can change the visual balance of the face.
Using Too Much Pressure
Heavy pencil pressure deposits more pigment and makes individual strokes difficult to blend.
Chasing Perfect Symmetry
Eyebrows do not have to be identical.
Aim for visual balance rather than exact duplication.
Skipping the Spoolie
Brushing through the finished brows can soften excess pigment and integrate makeup with the natural hairs.
Eyebrow Makeup Safety Tips
Because brow products are applied close to the eyes, hygiene should be part of every routine.
The FDA recommends keeping cosmetics and tools clean, not sharing eye cosmetics, and stopping use if an eye cosmetic causes irritation.
A few simple habits can reduce avoidable problems:
-
Wash your hands before applying products.
-
Keep brow pencils and brushes clean.
-
Do not share makeup products or tools.
-
Avoid using products that have changed in smell or appearance.
-
Do not apply makeup to irritated or infected skin.
-
Stop using a product if it causes irritation.
-
Use only cosmetics intended for the eye area.
-
Follow the manufacturer's storage and use instructions.
The FDA also advises against home eyebrow and eyelash dyeing or tinting because certain permanent tinting products have been associated with serious eye injuries.
For beginners, pencil, powder, pen, and brow gel are much simpler options than attempting chemical eyebrow tinting at home.
What If You Over-Pluck Your Eyebrows?
If too many hairs have been removed, resist the temptation to "fix" the other eyebrow by removing more hair.
Instead:
-
Stop tweezing.
-
Allow the area to grow naturally.
-
Use a brow pencil or pen to fill gaps temporarily.
-
Brush surrounding hairs into position.
-
Avoid repeatedly reshaping the same area.
Eyebrow growth varies between individuals, and different parts of the brow can have different growth patterns. Research has found that eyebrow density, hair diameter, and growth characteristics vary according to anatomical location, with the tail showing particularly different characteristics from the head and body.
This is another reason not to judge the final outcome immediately after over-plucking.
How Often Should You Shape Your Eyebrows?
There is no universal schedule because eyebrow hair grows at different rates.
Rather than completely reshaping the brows every few days, maintain the existing shape by removing obvious stray hairs when necessary.
For many people, a more substantial reshaping is only needed periodically.
The objective should be maintenance rather than repeatedly redesigning the eyebrow.
A Beginner-Friendly Eyebrow Routine
For a simple everyday routine, remember:
Brush → Map → Fill → Blend → Set
Brush
Comb the hairs upward and outward with a spoolie.
Map
Identify the approximate brow head, arch, and tail.
Fill
Add small strokes only where the brows look sparse.
Blend
Brush through the product with the spoolie.
Set
Apply a small amount of brow gel to hold the hairs in position.
This five-step routine is enough for most everyday looks.
Eyebrow Shaping vs. Eyebrow Filling - What's the Difference?
Although the two techniques are often discussed together, they solve different problems.
-
Eyebrow shaping changes the outline by trimming or removing unwanted hair.
-
Eyebrow filling changes the appearance of density by adding cosmetic pigment.
-
Someone with naturally thick but untidy eyebrows may need mostly shaping.
-
Someone with well-shaped but sparse eyebrows may need mostly filling.
Many beginners need a combination of both, but neither should be overdone.
When Should You See a Professional?
DIY maintenance can work well for small adjustments, but professional help can be useful when:
-
You are unsure what brow shape suits you.
-
The brows have been significantly over-plucked.
-
The eyebrows are very uneven.
-
You want threading or professional waxing.
-
You want a major change in shape.
-
You are considering eyebrow tinting or other professional treatments.
A professional can establish a shape that can then be maintained at home with minimal removal.
How to Make Eyebrow Makeup Look More Natural
Natural-looking brows are usually created through restraint rather than adding more product. Keep these principles in mind:
Follow the existing hair direction.
Do not draw every stroke in the same direction if the natural hairs change direction across the brow.
Fill gaps instead of repainting the whole brow.
Natural hairs already provide much of the structure.
Use different pressure.
The front should usually be lighter than the middle and tail.
Blend after application.
A spoolie is one of the easiest ways to soften excess pigment.
Check your brows from a distance.
A brow that looks perfect under a magnifying mirror may look much heavier when viewed normally.
The Golden Rules for Beginners
When learning to fill in eyebrows, build color slowly using light, flicking motions. If you are just starting out, remember these eight rules:
-
Do not over-pluck.
-
Follow your natural brow shape.
-
Use small, light strokes when filling.
-
Keep the brow front softer than the tail.
-
Blend with a spoolie.
-
Do not chase perfect symmetry.
-
Start with less product and build gradually.
-
Step back and look at both brows together.
The best beginner brow is not necessarily the most sculpted or dramatic. It is the brow that looks balanced, natural, and well-groomed while complementing the eyes and overall face.
Frequently Asked Questions About Eyebrow Shaping and Filling
Should beginners tweeze or wax their eyebrows?
Tweezing is generally easier to control when making small adjustments because individual hairs can be removed one at a time. Waxing can remove multiple hairs quickly but is less forgiving if too much hair is removed. Beginners who want a defined waxed shape may prefer having the first shaping performed professionally.
Should eyebrow pencil be darker or lighter than hair?
A slightly lighter or softer shade can be easier to control, especially for beginners. Very dark pigment can quickly make the eyebrows look heavy. Dark brown may also appear softer than black on naturally dark hair.
How can I make sparse eyebrows look fuller?
Use a fine pencil or brow pen to create short, hair-like strokes in sparse areas. Concentrate product where gaps are visible rather than covering the entire eyebrow with pigment. Finish with a spoolie to blend.
Why do my eyebrows look too dark after filling?
Too much pressure, an overly dark shade, or too many strokes can cause this. Brush through the brows with a spoolie to distribute the product. For the next application, use less pigment and lighter pressure.
How do I avoid a blocky eyebrow?
Keep the brow head light, avoid drawing a thick outline, and use small strokes that follow natural hair growth. Blending the front with a spoolie is also important.
Can I shape my eyebrows without filling them?
Absolutely. If your brows already have good density, simply brushing, trimming a few long hairs, and removing obvious strays may be enough.
How do I know where my eyebrows should start and end?
Use the side of the nose as a reference point. A vertical line toward the inner brow can help estimate the starting point, while a diagonal line toward the outer eye can help estimate the tail. These are guides rather than strict measurements because natural facial proportions vary.
How can I recover from over-plucked eyebrows?
Stop removing hair and allow the brows time to grow. In the meantime, use a pencil or pen to create temporary hair-like strokes in sparse areas. Avoid trying to make the opposite brow match by removing additional hair.
Final Thoughts
Learning eyebrow shaping and filling does not have to be intimidating. The most effective beginner approach is to work with the brows already there rather than trying to completely redesign them.
Start by mapping the approximate brow head, arch, and tail. Remove only obvious stray hairs, trim long hairs carefully, and choose a brow product that gives enough control to build color gradually.
When applying eyebrow makeup, focus on small, light strokes and leave the brow head softer than the middle and tail. A spoolie can then blend the pigment, and a small amount of brow gel can keep the hairs in place.
Most importantly, remember that natural brows are not perfectly symmetrical. The goal is not identical eyebrows; the goal is a balanced, flattering appearance.
For readers building a complete beauty routine, a complete makeup and beauty guide can provide a useful starting point for learning how different makeup products and techniques work together.
With a little practice, the basic sequence becomes simple:
Map. Shape. Fill. Blend. Set.
And when it comes to brows, starting with less is almost always easier than trying to correct too much.