
Eye Makeup Complete Guide - Eyeshadow, Eyeliner, And Mascara
Learn eyeshadow, eyeliner, and mascara techniques with easy step-by-step techniques for any shape.
Mastering eye makeup can feel overwhelming with the endless stream of products, tools, and complex tutorials online. However, creating stunning, professional-looking eyes comes down to a few fundamental techniques, the right application order, and understanding your unique eye anatomy.
Our makeup professionals at Beauty Depot Online break down everything you need to know. Whether you are searching for an easy eyeshadow tutorial, trying to build your first makeup kit, or looking to elevate your daily routine with fresh eyeshadow looks, this step-by-step masterclass will walk you through eyeshadow, eyeliner, and mascara with absolute clarity, no video required.
The Application Order - Why Sequence Matters
Before picking up a brush, you must understand why we apply eye products in a specific order: eyeshadow first, Eyeliner second, and Mascara last.
|
Step |
Product |
Primary Function |
Why It Goes Here |
|
1 |
Prep & Primer |
Creates a smooth, long-lasting base |
Prevents creasing, cancels out discoloration, and gives eyeshadow pigments a grip to cling to. |
|
2 |
Eyeshadow |
Builds depth, color, and dimension |
Powder fallout lands early in the process so it can be wiped away without ruining liner or mascara. |
|
3 |
Eyeliner |
Defines the lash line and eye shape |
Sits cleanly on top of blended shadows without getting obscured by mascara-coated lashes. |
|
4 |
Mascara |
Lifts, lengthens, and volumizes lashes |
Coating lashes last prevents them from collecting stray eyeshadow powder and catching on brush bristles. |
-
Why Eyeshadow Comes First - Eyeshadow powders produce fallout (tiny specks of dust that land on your lashes and cheeks). Applying shadow before liner or mascara ensures you don’t coat wet mascara with powder or smudge a sharp liner line.
-
Why Eyeliner Comes Second - Eyeliner anchors your eye look to your lash line. Placing it over your blended eyeshadow creates a sharp, defined contrast.
-
Why Mascara Is Last - Mascara coats your lashes in rich pigment and locks in their curl. If you apply mascara before shadow or liner, your lashes will get in the way of your brushes and catch stray powder, making them look dusty instead of dark and full.
Step 1 - Eye Anatomy & Preparation (The Canvas)
Before applying color, you need to know the topography of your eye and how to prepare it. Skipping preparation is the single biggest reason eyeshadow fades, creases, or turns muddy by noon.
Understanding Eye Anatomy
-
The Mobile Lid - The flat section of your eyelid that covers your eyeball and moves when you blink. This is where your focal colors and shimmers live.
-
The Crease - The natural indent or socket line located directly underneath your brow bone. Placing a mid-tone shadow here creates dimension and the illusion of depth.
-
The Outer V - The outer corner of your eye where your upper and lower lash lines meet, forming a sideways "V" or "C" shape. This area holds dark shades to anchor the eye and add structure.
-
The Inner Corner - The small nook next to your tear duct. Placing bright, reflective shades here makes your eyes look wider and more awake.
-
The Brow Bone - The rigid bone structure right beneath the arch of your eyebrow. A light matte or subtle shimmer here lifts the entire eye.
-
The Waterline - The narrow rim of skin between your lashes and your eyeball.
Prepping the Lid Step-by-Step
-
Cleanse - Ensure your eyelids are free from natural oils or facial moisturizers.
-
Prime - Dab a pin-sized dot of dedicated eye primer (or an oil-free matte concealer) onto the center of your mobile lid.
-
Blend - Gently tap the primer across the lid from the lash line up to the brow bone using your ring finger; its soft touch prevents pulling delicate skin.
-
Set - Dust a light layer of translucent setting powder or a skin-toned eyeshadow over the wet primer. This locks the liquid base in place and creates a silky, friction-free surface so your powders glide effortlessly without blotching.
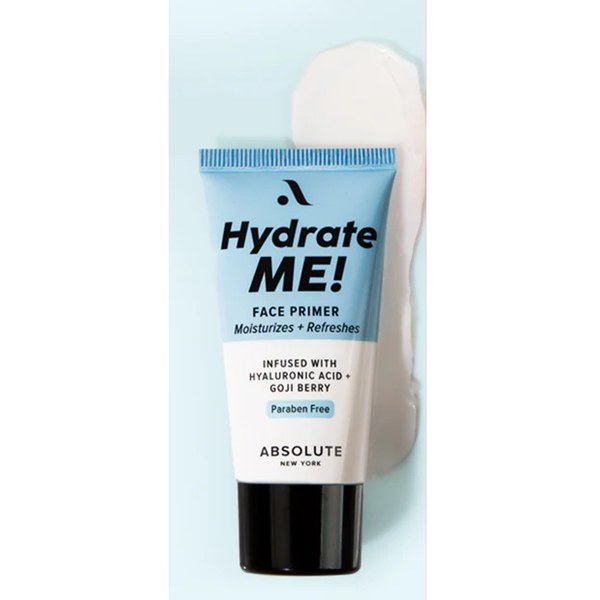
Look for a long-wear, moisturizing primer like the Absolute Face Primer - Hydrate Me! available at Beauty Depot Online to give your shadows a 12-hour vibrant hold.
Step 2 - The Three-Shade Eyeshadow Tutorial
You do not need a palette with 40 colors to create a breathtaking look. Every classic look, from an everyday neutral to a sultry evening style, relies on a simple three-shade system:
-
Light Base/Highlight Shade - 1–2 shades lighter than your skin tone (matte or shimmer).
-
Medium Transition Shade - 1–2 shades darker than your skin tone (always matte).
-
Dark Contour Shade - 3–4 shades darker than your skin tone (matte or soft satin).
How to Apply Your Eyeshadow Step-by-Step
If you are learning how to do eye makeup for the first time, grab a medium fluffy blending brush and a flat packing brush, then follow these exact physical movements:
Phase 1 - Lay the Transition Shade
-
Pick up a small amount of your medium matte shade using the tip of a fluffy blending brush. Tap the handle against your wrist to drop off excess powder.
-
Keep your eyes open and look straight into a mirror. Locate your eye socket crease.
-
Place the tip of the brush into the outer corner of that crease line.
-
Use a gentle "windshield-wiper" motion, sweeping left to right, right to left, following the natural curve of your socket bone.
-
Next, use small circular buffing motions along the top edge of that line to diffuse the color upward toward your brow bone. Result - A soft, seamless wash of color with no harsh lines.
Phase 2 - Build Depth in the Outer V
-
Switch to a smaller, denser dome brush and pick up your darkest shade.
-
Place the brush tip at the outer corner of your upper lash line.
-
Angle the brush up toward the tail of your eyebrow, pressing down lightly to form a short line.
-
Turn the brush inward and follow your crease line about one-third of the way across your lid, forming a sideways "V".
-
Gently press ("stamp") the shadow into this area rather than dragging it.
-
Take your fluffy blending brush (with no extra product) and blend the edges in small circles where the dark shade meets your transition shade. Result - Instant depth and a subtle lifted appearance.
Phase 3 - Brighten the Mobile Lid
-
Take a flat, firm packing brush (or use your index finger) and pick up your lightest shade or a shimmer.
-
Pat, do not sweep, the shade directly onto the inner two-thirds of your mobile lid, moving from the inner corner outward.
-
Stop where the light shade meets the dark outer V shade.
-
Lightly tap over the border where the two shades meet so they melt together seamlessly.
Phase 4 - Highlight the Focus Points
-
Using a small detail pencil brush, press your lightest shimmer shade into the very inner tear duct of your eye.
-
Sweep a touch of that same shade right underneath the arch of your brow bone to pull the entire eye upward.
Tailoring Eyeshadow Looks to Your Specific Eye Shape
Not all eyes are shaped the same. Adapting your technique according to your individual features will drastically improve your end result.
|
Eye Shape |
Characteristics |
Tailored Application Technique |
|
Hooded Eyes |
A fold of skin hangs over the crease, hiding the mobile lid when eyes are open. |
Fake a new crease - Apply your transition shade slightly above your actual fold onto the brow bone while looking straight ahead so color remains visible. Avoid thick liners. |
|
Monolid Eyes |
Flat eyelid surface with little to no visible crease fold. |
Create a gradient - Apply the darkest shade near the lash line, blending upward into a medium shade, finishing with the lightest shade near the brow. |
|
Almond / Upturned Eyes |
Symmetrical with outer corners naturally lifting upward. |
Enhance the wing - Focus dark shades heavily on the outer V and extend shadow outward toward the temples to highlight the natural lift. |
|
Downturned Eyes |
Outer corners drop downward below the inner corners. |
Lift the outer edge - Keep shadow strictly above an imaginary line drawn from the outer corner of your eye to the tail of your brow. Never bring dark shadow down into the lower outer corner. |
|
Deep-Set Eyes |
Eyes are set deeper into the skull, creating a prominent brow bone shadow. |
Pop the lid - Use bright, reflective shimmers across the main lid to bring the eyes forward. Keep crease shades very light so you don't deepen the shadow. |
Pro Tip - If you're building your first makeup kit, invest in a versatile neutral palette containing both matte and shimmer tones like those found in the curated collections at Beauty Depot Online.
Step 3 - Precision Eyeliner Application
Eyeliner defines your lash line, changes your eye shape, and makes your lashes look thicker at the root.
Pencil vs. Gel vs. Liquid Eyeliner
-
Pencil Eyeliner - Creamy and forgiving. Perfect for beginners learning how to do eye makeup because it smudges easily into a smoky finish if your line isn't perfectly straight.
-
Gel Eyeliner - Comes in a small pot applied with an angled brush. Offers the crispness of liquid liner with much higher stability and control.
-
Liquid Eyeliner - Comes as a felt-tip pen or brush-well. Delivers ultra-sharp lines and drama, but requires a steady hand.
Step-by-Step Tightlining (The Base Trick)
Tightlining means filling in the invisible gaps between your individual lash hairs along your upper waterline.
-
Gently lift your upper eyelid with a clean finger to reveal the underside of your top lashes.
-
Take a waterproof pencil or gel liner and gently run it along the upper waterline right at the roots of the hair.
-
Effect - Your lash base instantly looks twice as dense before you even apply mascara.
How to Draw the Perfect Winged Eyeliner (Without the Shake)
Drawing a clean winged line doesn't require artistic talent; it requires an anchor point and short movements.
-
Rest Your Elbow - Sit down at a table and rest your elbow on a flat surface. Anchor your pinky finger against your cheekbone to stabilize your hand.
-
Draw the Guide Line - Look straight into your mirror. Imagine a line continuing from your lower lash line upward toward the end of your eyebrow. Draw a short, light stroke outward along this line (about 2–5 mm).
-
Connect the Triangle - Place your liner tip slightly below the point of your wing. Draw a straight line back down to the center of your upper eyelid, forming a small hollow triangle.
-
Fill and Smooth - Fill in the blank space inside the triangle. Then, starting from the inner corner of your eye, draw a thin line hugging your lashes straight into the wing.
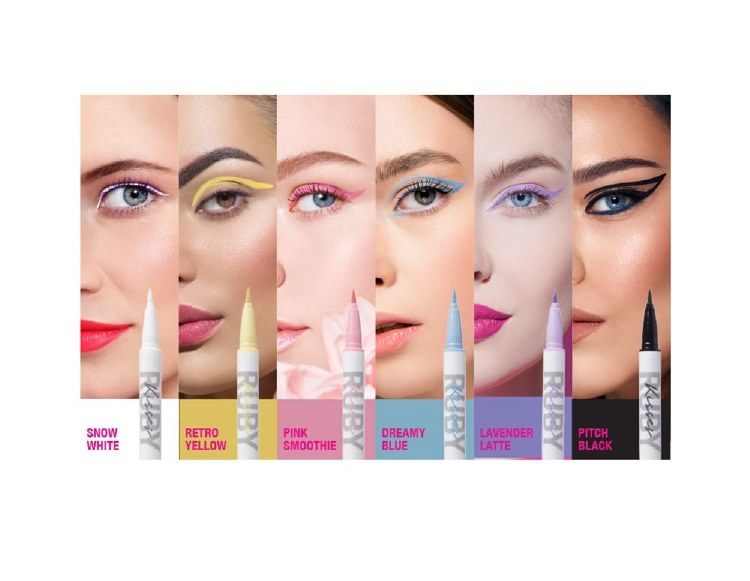
For beginner-friendly control, try the Ruby Kisses Party Proof Eyeliner - Waterproof Precision Felt-Tip Eyeliner Available In Different Colors.
Step 4 - Mascara Application (The Final Touch)
Mascara opens the eyes, pulls your shadow and liner together, and adds striking framing to the face.
The Power of the Eyelash Curler
Never skip curling your lashes. Uncurled lashes project outward or downward, casting a shadow over your eyes and obscuring your hard work with eyeshadow.
-
Open the curler and bring it to the base of your bare upper lashes.
-
Ensure all lash hairs are inside the clamp without catching your eyelid skin.
-
Gently squeeze for 5 seconds at the root.
-
Pulse the curler lightly halfway up the lash length for 3 seconds to create a soft, natural curve rather than a harsh 90-degree bend.
Coating Upper Lashes Step-by-Step
-
Wipe the Wand - Pull the wand out of the tube and scrape excess product onto the rim. Too much formula creates heavy clumps.
-
The Root-to-Tip Wiggle - Look down into a handheld mirror angled below your chin. Place the mascara brush right at the base of your top lashes.
-
Zig-Zag Motion - Wiggle the brush horizontally back and forth at the roots to deposit volume, then sweep smoothly up through the tips to separate and lengthen.
-
Build Layers - Apply a second coat while the first coat is still slightly tacky (within 30 seconds) to build dramatic volume without flake-inducing dry clumps.
Coating Lower Lashes (Optional)
Hold the mascara wand vertically and lightly touch the tip across your lower lash line. This subtle touch anchors your lower eye without bleeding onto your under-eye skin.
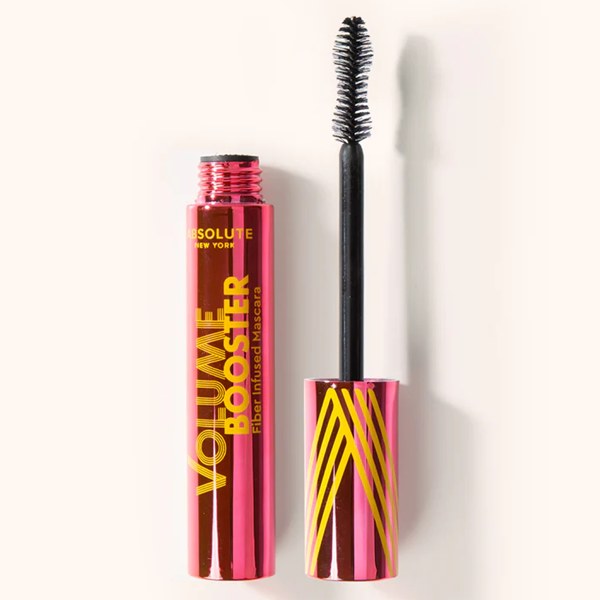
Enhance your natural lashes with a volumizing formula like Absolute Volume Booster Mascara - Lengthening & Volumizing Mascara available at Beauty Depot Online.
Common Beginner Mistakes (And Easy Fixes)
Even seasoned artists make errors. Here is how to correct the most common issues without wiping off your face and starting over:
Problem 1 - Shadow Looks Muddy
-
Cause - Over-blending different colors into one another or using a brush contaminated with dark pigment.
-
Fix - Keep separate brushes for dark and light shades. If colors blur together, dust a clean fluffy brush with translucent powder and gently clean up the outer edges using short, sweeping strokes.
Problem 2 - Eyeliner Wing Is Too Thick or Uneven
-
Cause - Trying to fix an uneven wing by drawing over it again and again.
-
Fix - Stop drawing! Dip a precise flat angled brush or a cotton swab into micellar water. Wipe away the mistake using an upward angle, reshaping the line effortlessly.
Problem 3 - Mascara Wet Smudges on the Eyelid
-
Cause - Blinking too fast after application or getting mascara on your shadow during application.
-
Fix - Do not touch it while wet! Let the mascara spot dry completely for 2 minutes. Once hard, take a clean, dry spoolie brush and flick it lightly; the dried spot will flake right off without damaging your underlying eyeshadow.
Simple Everyday Look vs. Dramatic Evening Glam
Now that you've mastered the fundamentals, here is how you can use the same core techniques to create two completely different eyeshadow looks:
|
Featuree |
Everyday Neutral Look |
Classic Evening Glam |
|
Primer / Base |
Light concealer set with powder |
Tinted eye primer |
|
Eyeshadow Palette |
Warm peaches, soft tans, creams |
Deep browns, charcoal, gold shimmer |
|
Transition Shade |
Soft taupe or warm beige |
Medium reddish-brown or warm mocha |
|
Outer V Shade |
Warm chocolate brown |
Deep espresso or rich matte black |
|
Lid Color |
Champagne shimmer or soft matte |
Metallic foil or bright gold |
|
Eyeliner Style |
Soft brown smudged pencil |
Crisp black liquid winged liner |
|
Mascara Finish |
One or two coats of brown/black |
Two full coats + false lashes |
Building Your First Eye Makeup Kit
If you are assembling your first makeup kit, you don't need hundreds of tools to build great eye looks. Stick to these fundamental essentials:
YOUR ESSENTIAL EYE KIT
-
Eyeshadow Primer
-
Neutral 9-Pan Palette
-
Gel/Pencil Eyeliner
-
Precision Liquid Liner
-
Eyelash Curler
-
Volumizing Mascara
-
Trio Brush Set
-
Fluffy Blending Brush
-
Dense Packing Brush
-
Angled Detail Brush
-
Essential Tool Maintenance
Clean brushes are non-negotiable for smooth makeup application. Wash your eye brushes once a week using a gentle brush cleaner or mild baby shampoo. Swirl them in warm water, rinse, squeeze out excess water, and lay them flat to dry. This prevents bacterial growth and keeps your color application vibrant and true to pan.
Frequently Asked Questions
What is the correct order to apply eye makeup?
The ideal order is Eyeshadow, Eyeliner, then Mascara. Applying eyeshadow first prevents fallout from ruining your eyeliner and mascara. Applying eyeliner second gives you a clean canvas to lay down defined lines. Finishing with mascara ensures your lashes stay coated, lifted, and dark without catching stray powder.
How do I prevent my eyeshadow from creasing during the day?
Always start with an oil-absorbing eyeshadow primer or a thin layer of matte concealer. Avoid applying oily facial moisturizers or heavy eye creams directly to your eyelids before applying makeup, and set your wet primer with a light dusting of translucent powder.
What eyeshadow colors best suit my eye color?
Complementary color theory works best:
-
Blue Eyes - Warm copper, bronze, peach, and warm brown shades make blue pop.
-
Green/Hazel Eyes - Plum, mauve, berry, and rich burgundy tones accentuate green hues.
-
Brown Eyes - Brown is neutral, meaning almost any shade works! Rich blues, deep purples, golds, and teals offer gorgeous contrast.
How do I stop mascara from smudging under my eyes?
Smudging usually occurs when natural oils from your skin melt the mascara formula. To prevent this, lightly dust translucent powder under your lower lash line to absorb oil throughout the day, or switch to a tubing/waterproof mascara.
Upgrade Your Eye Makeup Routine Today
Mastering eye makeup is an art form built on simple, repeatable techniques. By prepping your lids, placing your shadows intentionally according to your eye shape, anchoring your lash line with liner, and finishing with lifted lashes, you can effortlessly create any style you choose.
Ready to build your ultimate makeup collection? Explore our complete line of high-performance palettes, long-wearing eyeliners, and nourishing mascaras at Beauty Depot Online. For more step-by-step beauty guides, beauty tips, and product recommendations, check out our Complete Makeup Guide hub!