
Eyeshadow Basics Every Makeup Expert Should Know - Blending And Color Placement
A simple step-by-step beginner guide to seamless eyeshadow placement and easy blending.
Applying eyeshadow can feel like a high-stakes art project; one minute you're aiming for a subtle daytime glow, and the next you look like you got punched in the eye or got lost in a 1980s music video.
The secret to a flawless eye look isn't owning a hundred expensive palettes; it’s mastering eyeshadow placement and knowing how to properly blend eyeshadow.
Whether you're struggling with muddy colors, harsh lines, or eyeshadow that disappears into your crease after an hour, this comprehensive eyeshadow tutorial breaks down everything you need to know. From understanding your eye anatomy to picking the right Makeup Tools, consider this your all-in-one Makeup Guide to effortless, professional-looking eye makeup by Beauty Depot Online.
The 4 Zones of Eyeshadow Placement
Before picking up a brush, you need to understand the blueprint of your eyelid. Proper eyeshadow placement relies entirely on working with your natural eye structure to create dimension, depth, and the illusion of larger, brighter eyes.
The Eyelid (The Canvas)
-
Location - The mobile part of your eye that opens and closes, stretching from your upper lash line to the socket fold.
-
Color Role - Light to medium shades, shimmers, foils, or bright pops of color.
-
Placement Goal - Packing a lighter or reflective shade flat across the lid reflects light, making the eye look wider and more awake.
The Crease (The Transition Zone)
-
Location - The indented fold where your eyelid tucks under your brow bone when your eye is open.
-
Color Role - Neutral, matte, medium-toned transition shades (usually 1–2 shades darker than your skin tone).
-
Placement Goal - Applying color here carves out natural depth, bridging the gap between your bright lid and your brow bone.
The Outer V (The Structure)
-
Location - The outer third of the eye, forming a sideways V or C shape from the outer lash line up into the crease fold.
-
Color Role - Your deepest, richest matte shades (deep browns, plums, dark charcoal).
-
Placement Goal - Darkening this specific zone draws the eyes outward, creating an instantly lifted, almond-shaped effect.
The Brow Bone & Inner Corner (The Accents)
-
Location - Directly under the arch of your eyebrow and the small tear duct area at the inner eye.
-
Color Role - Pale matte shades, champagne shimmers, or icy highlights.
-
Placement Goal - Highlighting these high points reflects light, lifting the brow arch and opening up the entire face.
Essential Eyeshadow Brushes - Quality Tools over Quantity
You cannot blend eyeshadow effectively with the foam sponge applicators that come free in drugstore compacts. Investing in proper Makeup Tools does 80% of the work for you. To follow any basic eyeshadow tutorial, you only need three core brushes:
|
Brush Type |
Design Features |
Primary Function |
|
Flat Shader Brush |
Firm, short, densely packed |
Packing pigment onto the lid |
|
Fluffy Blending Brush |
Long, loose, dome-shaped |
Diffusing lines in the crease |
|
Precision Tapered Brush |
Small, dense, slightly pointed |
Concentrating dark color in Outer V |
1. Flat Shader Brush
-
Design - Features short, firmly packed bristles with a flat edge.
-
Function - Designed to pack maximum pigment onto your eyelid using pressing motions rather than sweeping strokes.
2. Fluffy Blending Brush
-
Design - Long, loosely packed bristles tapered into a soft dome.
-
Function - Sweeps transition shades into the crease and blurs harsh borders. The loose bristles prevent harsh color deposits.
3. Tapered Precision Brush
-
Design - A small, dense brush with a pointed or tight tip.
-
Function - Offers extreme control when placing deep shades into the small Outer V corner without muddying the rest of your lid.
Stop struggling with low-quality applicators! Grab a professional 5-piece synthetic eye brush set, the Nicka K Face Essential Brush Set, featuring high-density shader brushes, ultra-soft fluffy blenders, and precision detail tips to diffuse pigment effortlessly.
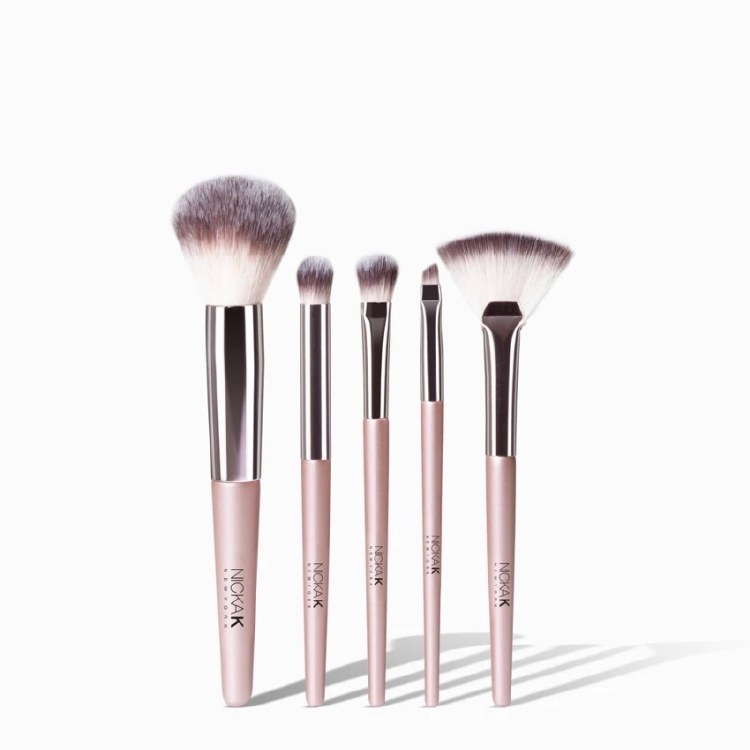
Pro Tip - Look for a budget-friendly, 5-piece synthetic set that includes a dedicated fluffy blending brush, an eyeshadow C brush, and precision detail tips. Synthetic bristles work exceptionally well for both liquid primers and powder shadows while remaining cruelty-free. Check out our curated selection in our Complete Beauty Guide section.
Step-by-Step Eyeshadow Tutorial
Follow this step-by-step eyeshadow tutorial for a classic, universally flattering daytime-to-nighttime look.
Step 1 - Prep and Prime the Lids
Never skip primer! The skin on your eyelids produces natural oils that break down shadow pigment, causing creasing and fading within hours.
-
Apply a thin pea-sized layer of dedicated eye primer or a full-coverage concealer across the entire eyelid.
-
Pat it out smoothly with your ring finger or a damp sponge until seamlessly blended.
Step 2 - Set Your Base
-
Sweep a neutral, skin-toned matte shadow or translucent setting powder all over your lid from the lash line up to the brow bone.
-
This sets the wet primer, giving your powder shadows a smooth, friction-free surface to glide over when you begin to blend eyeshadow.
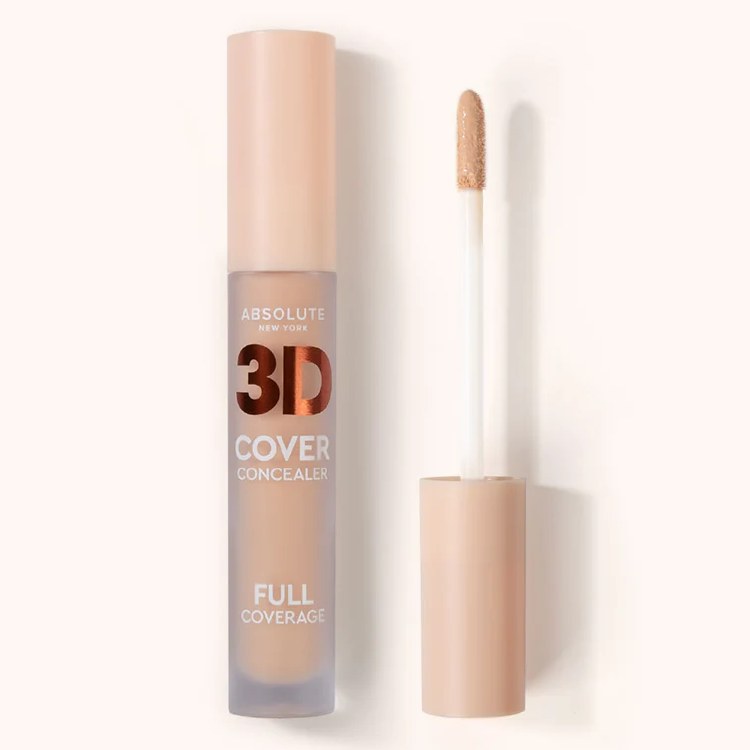
Locked-in color starts before the shadow hits your lid. Pair your look with our top-rated crease-proof eyeshadow base to smooth out texture and extend wear up to 16 hours. Try this Absolute 3D Cover Concealer Full Coverage.
Step 3 - Define the Crease
-
Dip your fluffy blending brush into your medium transition shade. Tap off any excess powder.
-
Position the brush directly in the fold of your eye socket.
-
Sweep back and forth using gentle windshield-wiper motions, following the natural curve of your eye to build subtle depth.
Step 4 - Deepen the Outer Corner
-
Switch to your tapered precision brush and pick up your dark shade.
-
Map out a sideways V shape at the outer corner of your eye, connecting your upper lash line to the outer edge of your crease.
-
Press or tap the pigment into place first rather than rubbing it back and forth.
Step 5 - Brighten the Lid & High Points
-
Take your flat shader brush and press your lightest matte or shimmering shade onto the inner two-thirds of your eyelid.
-
Tap a tiny dot of highlight shade on your inner corner (tear duct) and directly underneath the arch of your brow bone to instantly awaken tired eyes.
Step 6 - The Final Seamless Blend
-
Grab a clean fluffy blending brush (with no extra product on it).
-
Gently soften the outer edges where the darker shade meets the lighter shades to eliminate any remaining harsh lines.
How To Blend Eyeshadow To Avoid Muddy Eyeshadow
The most common complaint from beginners is that their colors melt into a single, muddy gray or brown mess. Blending is an art of pressure, motion, and brush control.
-
INCORRECT - High Pressure + Choked Grip = Harsh Lines / Muddy Pigment
-
CORRECT - Light Pressure + End-of-Handle Grip = Soft Gradient / Smooth Diffusion
Hold the Brush Handle at the End
If you hold your brush close to the ferrule (the metal band), you exert too much pressure on the skin. This pushes pigment deep into the pores, creating stubborn splotches. Hold the very end of the brush handle; this forces you to use a feather-light touch.
Master the Two Essential Motions
-
Windshield Wiper Strokes - Wide, sweeping back-and-forth arcs across the crease line to evenly distribute transition shades.
-
Micro-Circles - Tiny, tight circular motions used directly over harsh borders where two distinct shades meet. This slowly diffuses the boundary without spreading dark pigments across your entire lid.
Keep a Clean Towel Nearby
When working with dark shades, wipe your blending brush clean on a micro-fiber towel or color-removal sponge before moving to a lighter area. Applying a light shade with a dark-pigment-coated brush is the fast track to a muddy look.
Color Theory - Picking Best Colors for Your Eye Color
While makeup has no rigid rules, leveraging basic color theory principles ensures your natural eye color pops. Choosing complementary shades creates a stunning, high-impact contrast.
|
Eye Color |
Lid Shade |
Crease Shade |
Outer V Shade |
|
Blue Eyes |
Soft Champagne |
Warm Terracotta Brown |
Deep Bronze / Copper |
|
Green & Hazel Eyes |
Shimmering Rose Gold |
Dusty Mauve |
Deep Plum / Aubergine |
|
Brown Eyes |
Soft Taupe / Beige |
Neutral Soft Brown |
Rich Navy / Olive Green |
Best Palette Choices for Blue Eyes
Warm orange, copper, and bronze tones contrast dramatically with blue, making the iris stand out vividly.
-
Lid - Soft Champagne shimmer.
-
Crease - Warm Terracotta or peach-infused brown.
-
Outer V - Deep warm bronze.
Best Palette Choices for Green and Hazel Eyes
Red and purple undertones sit opposite green on the color wheel, highlighting red, gold, and green flecks within hazel eyes.
-
Lid - Shimmering rose gold.
-
Crease - Dusty mauve or lavender-brown.
-
Outer V - Rich plum or deep aubergine.
Best Palette Choices for Brown Eyes
Brown is a neutral base containing traces of all primary colors, meaning brown eyes can wear almost every shade on the spectrum. To create striking contrast, turn to cool jewel tones.
-
Lid - Soft metallic taupe or gold.
-
Crease - Neutral soft mid-tone brown.
-
Outer V - Rich midnight navy blue, dark chocolate, or metallic olive green.
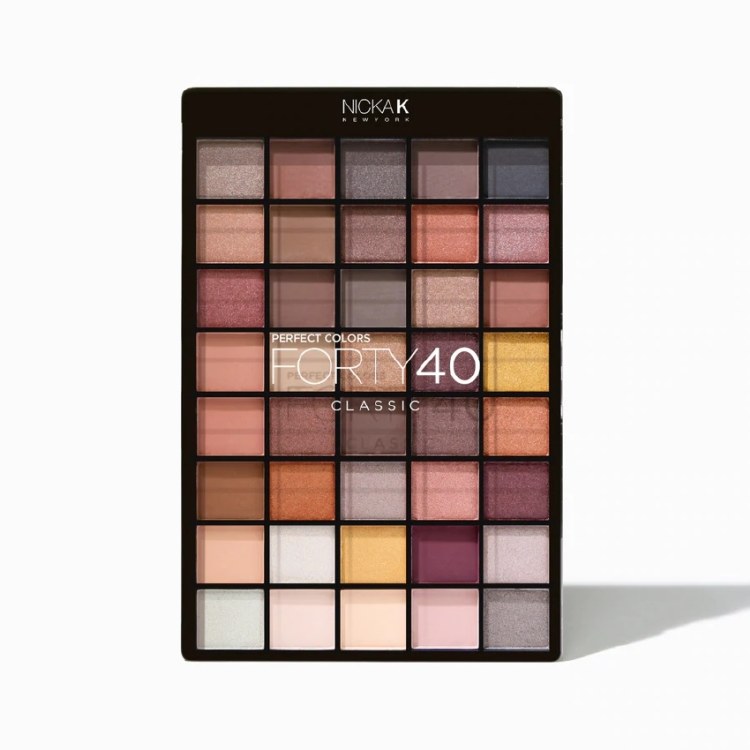
Find your perfect eyeshadow palette at Beauty Depot Online. Get Nicka K New York 40 Perfect Forty Colors Classic Palette today.
Pro Troubleshooting - How to Tailor Placement to Your Eye Shape
Standard eyeshadow placement works on symmetrical almond eyes, but modifying your technique for your specific shape will transform your Eye Makeup routine.
Hooded Eyes
-
The Challenge - Excess skin folds down over the natural crease when your eyes are open, hiding your lid work completely.
-
The Fix - Apply your crease transition shade slightly above your actual fold onto the brow bone while looking straight ahead into a mirror. Creating a higher fake crease ensures your shadow remains visible even with open eyes.
Monolid Eyes
-
The Challenge - Monolid shapes feature little to no defined eye socket crease line.
-
The Fix - Focus on creating a soft vertical gradient rather than horizontal zones. Place your darkest color closest to the lash line and blend eyeshadow upward, gradually fading into a light shade near the brow.
Deep-Set Eyes
-
The Challenge - The brow bone is more prominent, casting a shadow over the eyelid.
-
The Fix - Keep dark outer corner shadows light-handed and precise. Avoid overly dark crease shades that accentuate the deep socket; stick to light-reflecting shimmers across the eyelid to bring the eye forward.
Frequently Asked Questions
Why does my eyeshadow always look muddy after blending?
Muddy eyeshadow usually happens for three reasons: holding your brush too close to the bristles (which applies too much pressure), using a dirty brush with lingering dark pigment, or over-blending your shades into one area. To fix this, hold the end of the brush handle for a feather-light touch, use small circular motions only where colors meet, and wipe your brush on a microfiber towel between shades.
Do I really need eye primer, or can I just use concealer?
While concealer works as a quick substitute in a pinch, a dedicated eye primer is formulated specifically to block the natural oils on your eyelids. If you have oily lids, deep-set eyes, or hooded eyelids, a matte eye primer will perform significantly better at preventing creasing, smudging, and fading throughout the day.
How do I stop eyeshadow fall-out under my eyes?
To prevent dark specks from ruining your foundation, always tap off excess powder from your brush before bringing it to your eye. When applying dark colors to the outer corner, press or tap the shadow onto the lid instead of sweeping it. Alternatively, apply your eye makeup first before putting on your concealer and foundation, or use under-eye shadow shields.
How can I adapt standard eyeshadow placement for hooded eyes?
With hooded eyes, the fold of skin covers the natural crease when your eyes are open. To adapt standard placement, apply your crease transition shade slightly above your natural fold while looking straight ahead into a mirror. Creating a "fake crease" higher up on the brow bone ensures your eyeshadow remains visible when your eyes are open.
What is the difference between a flat shader brush and a fluffy blending brush?
A flat shader brush has short, densely packed bristles designed to pick up maximum pigment and pack it flat onto the eyelid. A fluffy blending brush has long, loosely packed bristles in a dome shape designed to sweep back and forth to diffuse harsh borders and build seamless transition shades in the crease.
Level Up Your Makeup Routine
Mastering eye shadow takes a bit of practice, but with the right Makeup Tools and a clear understanding of your eye anatomy, you can create stunning looks effortlessly. Start simple - practice proper eyeshadow placement using neutrals, focus on light-handed blending techniques, and experiment with complementary shades to highlight your eye color.
Looking for top-tier beauty products, brush sets, and step-by-step guides? Explore our full collection of professional palettes and tools in our main Eye Makeup store or check out our complete Eye Makeup resource hub today!