
Foundation Application Techniques - Brush vs Sponge vs Fingers!
Understand foundation brush, sponge, and finger techniques for an airbrushed skin finish.
Finding your holy grail foundation is only half the battle. The real magic happens during the execution. Whether you are aiming for a sheer, daytime glow or a full-coverage, camera-ready complexion, the tool you choose dictates exactly how your makeup behaves.
When you sit down to apply foundation, you are faced with three classic paths - the precision of a brush, the seamless blend of a sponge, or the natural warmth of your fingers. Each method yields a drastically different finish, altering the coverage, texture, and longevity of your product.
This is an ongoing debate - foundation brush vs sponge vs fingers. Explore the science of how makeup interacts with skin, and give you the step-by-step techniques to elevate your daily foundation application.
The Anatomy of Skin and Makeup Interactivity
To understand why one applicator works better than another, we have to look at the canvas itself. Your skin isn't a flat, uniform surface; it features micro-textures, pores, fine lines, and varying oil zones. Foundation is an emulsion of pigments, oils, waters, or silicones designed to sit evenly across this landscape.
How a product settles depends heavily on the kinetic energy and pressure used during application:
-
Friction and Sweeping - Can micro-exfoliate dry patches, lifting dead skin cells and causing product to cling or look flaky.
-
Stippling and Pressing - Pushes pigments into the skin's micro-depressions, filling in pores and smoothing texture without disturbing the underlying skin barrier.
By mastering the mechanics of your tools, you change how the product interacts with your unique skin texture.
Brushes - Maximum Coverage and High-Efficiency
If you want an immaculate, high-impact finish, a high-quality makeup brush is your best ally. Brushes keep the product sitting on top of the skin's surface, ensuring that almost none of the pigment is absorbed by the tool itself. This makes brushes the most efficient choice for stretching a small amount of product across the entire face while maintaining maximum coverage.
Pairing a high-density flat top kabuki brush like the Absolute New York Luminous Glow Kabuki Pro Brush with your favorite formula allows you to build seamless layer after layer with minimal effort.
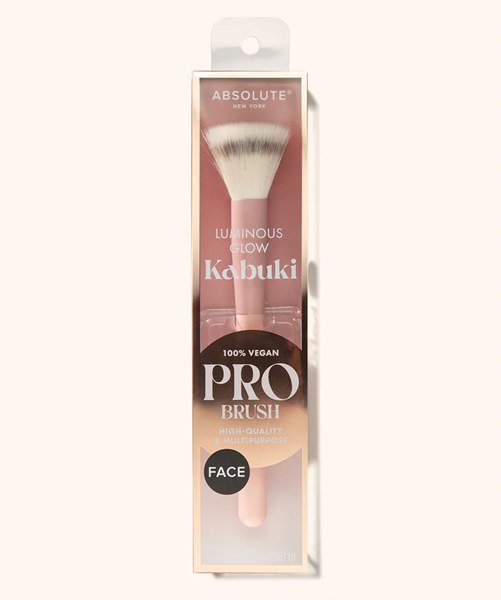
The Buffing Method
Best suited for dense, round-top kabuki brushes. This technique fuses the foundation with the skin, blurring out pores and uneven texture.
-
Step 1 - Place small dots of liquid or cream foundation on the central points of your face (forehead, nose, cheeks, and chin).
-
Step 2 - Hold the brush at a 90-degree angle to your face. Using light to medium pressure, blend the product in small, circular, overlapping motions.
-
Step 3 - Work from the center of the face outward. The circular motion buffs the pigments down into the pores rather than letting them sit on top, effectively avoiding streaks.
The Painting Method
Best suited for classic, flat foundation brushes. This is a traditional pro-artist technique ideal for layering and mapping out coverage.
-
Step 1 - Dispense foundation onto a palette or the back of your hand. Dip the flat side of the brush lightly into the product.
-
Step 2 - Use fluid, downward strokes to apply the foundation across the face. Always work downward to avoid lifting the fine vellus hairs (peach fuzz) on your face, which can make foundation look unnaturally textured.
-
Step 3 - As you reach the jawline, hairless perimeters, and neck, gently feather out the edges using the very tip of the brush to prevent harsh lines of demarcation.
Best For:
Liquid, heavy cream, and full-coverage foundations. Brushes are excellent for those dealing with hyperpigmentation, acne scarring, or anyone desiring a structured, polished makeup look.
To explore premium brush options designed specifically for these advanced techniques, check out the curated selection of tools available at Beauty Depot Online.
Sponges - The Flawless, Airbrushed Blend
The beauty sponge completely revolutionized modern makeup routines, and for good reason. It is the ultimate tool for achieving a seamless, skin-like finish that looks completely textureless, even under harsh lighting. Reaching for an ultra-soft, latex-free option like the Kiss Professional MakeUp Ergonomic Sponge ensures effortless blending that melts makeup right into your complexion.
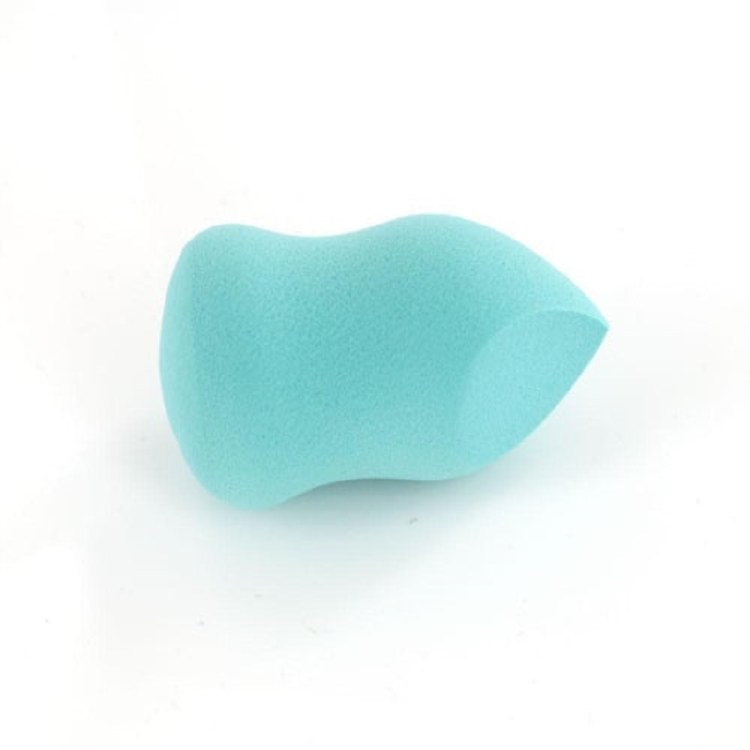
The secret lies in moisture. A damp sponge introduces controlled hydration to the foundation application, slightly thinning out heavy pigments and pressing them down so they lock tightly onto the epidermis.
The Golden Rule - Damp Application
Using a dry makeup sponge is a recipe for wasted product and patchy skin. A dry sponge acts like a thirsty paper towel, sucking up your expensive foundation.
-
The Prep - Submerge your makeup sponge completely under running water. Squeeze it repeatedly until it fully expands to its maximum size.
-
The Squeeze - Turn off the tap and wring out the bulk of the water. Wrap the damp sponge in a clean, dry towel and give it one final, firm squeeze. It should feel cool and plump, but completely damp to the touch without dripping a single drop of water.
The Press and Roll Technique
Dragging or smearing a sponge across your face defeats its engineering. Instead, adopt the bounce.
-
Step 1 - Bounce the rounded base of the damp sponge into foundation dispensed on your hand or directly dotted onto the skin.
-
Step 2 - Press and bounce the sponge into your skin using rapid, gentle bouncing or rolling motions. This kinetic action forces the foundation emulsion into the skin's ridges rather than smearing it around loosely.
-
Step 3 - Use the pointed tip or chiselled edges of the sponge to navigate difficult micro-regions, such as the inner corners of the eyes, the sides of the nose, and right beneath the lower lash line.
Best For:
Sheer to medium coverage, tinted moisturizers, BB creams, and avoiding cakiness on dry or mature skin types. The damp sponge absorbs just enough excess product to ensure you never over-apply, leaving behind an ethereal, airbrushed glow.
Fingers - The Natural, Melt-In Finish
Never underestimate the power of your original makeup tools. Applying foundation with your fingers is highly favored by many editorial makeup artists because it delivers an effortlessly beautiful, lived-in texture that tools sometimes struggle to mimic.
Warmth is Key
Your body generates natural infrared heat. When you use your hands to apply foundation, your fingertips gently warm up the waxes, oils, and silicones within the formula. This thermal softening changes the viscosity of the foundation, allowing it to melt seamlessly into the skin like a second skin barrier, rather than sitting on top as a separate layer.
The Pressing and Spreading Motion
To keep your skin looking clean and radiant without creating uneven streaks, use a strategic mapping approach.
-
Step 1 - Thoroughly wash your hands with an antibacterial cleanser.
-
Step 2 - Dot a small amount of product (roughly one controlled pump) onto the center of your forehead, the bridge of your nose, the apples of your cheeks, and your chin.
-
Step 3 - Using the flat pads of your middle and ring fingers, which naturally exert less pressure than your index finger, gently press and spread the foundation outward toward the hairline and jawline.
-
Step 4 - Finish by pressing your clean, warm palms firmly against your cheeks and forehead for five seconds. This sets the product using your natural body heat.
Best For:
Lightweight liquid foundations, serum foundations, skin tints, and quick, minimal everyday makeup routines. It is also an exceptional technique for underpainting (applying cream contour and blush under a sheer layer of foundation) because your hands won't displace the product underneath the way a friction-heavy brush might.
Foundation Brush vs Sponge vs Fingers
To help you decide which method fits your current lifestyle, skin type, and morning timeline, let's put these three popular methods head-to-head across critical performance metrics.
|
Metric |
Foundation Brush |
Makeup Sponge |
Fingertips |
|
Primary Finish |
Polished, high-coverage, airbrushed |
Seamless, dewy, skin-like |
Natural, radiant, satin-melt |
|
Coverage Level |
Medium to Maximum |
Sheer to Medium |
Sheer to Medium |
|
Product Waste |
Minimal (Stays on surface) |
Moderate (Absorbs excess) |
Zero (Total transfer) |
|
Best Skin Type |
Normal, Oily, Combination |
Dry, Textured, Mature |
Normal, Dry, Dehydrated |
|
Application Speed |
Fast (Broad strokes) |
Medium (Requires bouncing) |
Ultra-Fast (No cleanup) |
|
Hygiene Overhead |
High (Requires regular washing) |
High (Deep clean daily) |
Low (Wash hands before) |
Choosing between a foundation brush vs sponge or your fingers doesn't have to be a permanent choice. Many professional routines leverage the strengths of multiple tools. For example, you can use a dense brush to build intense coverage over areas with active blemishes, and then follow up with a damp sponge across the cheeks to sheer out the edges for a beautifully balanced finish.
Pro-Level Advanced Tricks for Complexion Perfection
Achieving an unclockable foundation application involves understanding how to prep the skin and how to handle tricky textures like pores and fine lines.
The Pore-Fading Press
If you struggle with enlarged pores around the nose and T-zone, sweeping foundation over them often highlights them. Instead, take a dense buffing brush or the tip of a damp sponge and firmly push the foundation downward and slightly upward into the pore. Think of it as filling a microscopic divot smoothly so light bounces cleanly off the surface.
The Layering Strategy
Always start your foundation application from the center of the face and blend outward. The center of the face (around the nose, chin, and between the brows) is typically where we experience the most redness, discoloration, and breakouts.
By keeping the bulk of the pigment centered and sheering it out as you approach the hairline, ears, and jawline, you create a natural optical illusion. People see the sheer edges and assume your entire face is bare and naturally flawless.
Pre-Application Calibration
No application technique can save a poor skin prep routine. For a detailed breakdown of how to prepare different skin types for smooth makeup wear, consult our comprehensive Foundation and Concealer Guide. Ensuring your skin is properly hydrated prevents your makeup from oxidizing or breaking down prematurely throughout the day.
Hygiene and Tool Maintenance - The Longevity Factor
Your tools can only perform as well as they are maintained. Dirty applicators accumulate dead skin cells, sebum, residual pigments, and airborne bacteria. When reused without cleaning, they introduce bacteria back onto your face, causing breakouts, texture issues, and degrading the performance of your makeup.
-
Brushes - Deep clean your liquid and cream brushes at least once a week. Use a dedicated brush cleanser or a gentle, clarifying shampoo. Submerge only the bristles in warm water; keeping the metal ferrule dry protects the water-soluble glue holding the bristles together.
-
Sponges - Because sponges retain moisture internally, they can become breeding grounds for mold if left damp in dark spaces. Wash your beauty sponge with a solid or liquid cleanser after every single use, and always let it air dry in an open, well-ventilated area.
-
Fingers - This one is simple but non-negotiable. Always wash your hands immediately before touching your face to prevent the transfer of dirt and oils.
For a deeper look into selecting high-durability utensils that stand up to regular washing, explore this breakdown of the best makeup applicators and tools to find items that match your skin's specific needs.
Troubleshooting Common Foundation Fails
Even with the right tools, minor environmental variables can impact your final look. Here is how to fix common issues on the fly:
The Foundation is Flaking or Peeling
-
The Cause - This is often caused by "pilling," which happens when your skincare ingredients conflict with your foundation base (e.g., mixing a heavy oil-based moisturizer with a water-based foundation). According to cosmetic chemistry, mismatched bases cannot bind properly, causing the product to ball up under friction.
-
The Fix - Use a damp sponge to gently press a tiny drop of facial oil or hydrating primer over the flaking areas to re-emulsify the pigments, and make sure your skincare is fully absorbed before applying makeup next time.
The Finish Looks Cakey and Heavy
-
The Cause - Too much product has been piled onto areas with natural movement, like the laugh lines or forehead.
-
The Fix - Take a clean, slightly damp beauty sponge with no leftover product on it and press it firmly over the heavy zones. The clean sponge will lift away excess layers of pigment while keeping the base intact underneath.
The Coverage Fades and Melts by Midday
-
The Cause - Oversaturated sebum zones or a lack of setting support.
-
The Fix - Before altering your foundation application technique, ensure you seal your work. Use a translucent powder gently pressed over oil-prone zones with a small powder brush, followed by an alcohol-free setting spray to lock the emulsion in place. For more guidance on managing oily complexions, review the clinical skin health resources provided by the American Academy of Dermatology.
Frequently Asked Questions
Should I apply concealer before or after foundation?
For most routines, apply foundation first. Foundation creates an even base and covers the majority of redness and minor discoloration, meaning you will end up using significantly less concealer. Reserve concealer for targeted areas that still need extra coverage, like dark under-eye circles or active blemishes, and gently blend it into your foundation using a damp sponge tip or a small precision brush.
Can I use the same brush for both liquid and powder foundations?
It is best to use separate brushes. Liquid foundations require dense, synthetic bristles that won't absorb wet product and can handle fluid blending. Powder foundations work best with fluffier, softer brushes (like a powder or kabuki brush) that pick up dry pigments evenly without clumping. Using a brush damp with liquid foundation to apply powder will turn the powder cake hard and leave patchy streaks on your face.
Why does my foundation look dry and flaky even when I use a damp sponge?
Flakiness usually stems from poor skin preparation or product incompatibility rather than the sponge itself. If dead skin cells aren't gently exfoliated or your skin lacks hydration beneath the makeup, foundation will cling to dry patches. Make sure to apply a hydrating moisturizer 5–10 minutes before makeup, let it fully absorb, and check that your moisturizer's base (water or oil) matches your foundation's formula.
How often should I wash my foundation brush and makeup sponge?
Makeup sponges should ideally be rinsed and cleaned after every single use because their damp interior can harbor bacteria and mold. Foundation brushes used with liquids or creams should be deep-cleaned at least once a week with a gentle clarifying cleanser or brush soap to prevent buildup and keep application smooth.
Which application method uses the least amount of foundation?
Using your fingers yields zero product absorption, ensuring every drop goes directly onto your skin. If you prefer using tools, a dense synthetic foundation brush is the next most efficient option, as it holds product on the surface of the bristles rather than soaking it up as a sponge does.
Finding Your Signature Application Strategy
Ultimately, there is no single right way to handle your everyday routine. The best way to apply foundation comes down to evaluating your skin's unique needs on any given day, understanding the coverage your formula provides, and pairing them with the right applicator.
Experiment with different methods - use your fingers on casual weekends for a fresh, breathable finish, pull out a high-density brush when you need an immaculate, long-wearing base for an evening event, or rely on a damp sponge to keep your skin looking fresh, plump, and airbrushed all summer long. By mastering the balance of a foundation brush vs sponge vs your fingers, you take total control over your makeup's finish.