
How To Overline Lips Naturally Lip Liner Tutorial Guide
Discover practical lip liner tips to enhance your natural pout effortlessly every day.
Achieving a voluminous, pillowy pout without looking overdone is the holy grail of modern makeup. We’ve all seen overlining gone wrong: harsh ring-around-the-mouth lines, exaggerated corners, and a distinctly "drawn-on" appearance that immediately draws attention for all the wrong reasons. But when done correctly, overlining subtle zones can give your lips an enviable, naturally plump lift.
Whether you're looking for everyday wear tips or brushing up on a modern lip liner tutorial, the secret lies in strategic placement, understanding facial light, and using precise formulas. In this step-by-step guide from Beauty Depot Online, we’ll break down the exact technique to achieve a soft, dimensional ombré pout that enhances your natural beauty seamlessly.
Why Traditional Overlining Fails (And How Modern Micro-Overlining Works)
The reason many overlining methods look artificial boils down to simple geometry and lip structure. Traditional tutorials often recommend tracing outside your lip line entirely from corner to corner. However, overlining the outer corners flattens the mouth’s dynamic shape and creates an unnaturally wide, heavy look.
Modern micro-overlining focuses on creating dimension rather than artificially extending your entire lip boundary. Instead of drawing far outside your lips, you only focus on tiny, half-millimetre extensions at the highest and lowest central points.

To master how to overline lips gracefully, think of lip liner as creating architecture and depth. Before diving into the step-by-step method, make sure your beauty bag is stocked with smooth, highly pigmented liners and hydrators. You can explore our complete lip products guide to find formulas that glide smoothly without tugging or bleeding into fine lines.
Step-by-Step Natural Overlining Technique
Follow these step-by-step instructions to create a seamless, soft-focus pout with depth and natural volume.
Step 1: Choose the Right Shade & Formula
Selecting the correct pencil shade is the single most crucial choice in your routine.
-
The Ideal Shade: Pick a shade that matches your bare lip tone or is just 1 to 2 shades deeper in a soft neutral nude or mauve. Avoid overly dark or muddy cool-toned shades, which look obvious in daylight.
-
Formula Selection: Look for creamy, waterproof, or peptide-infused pencils. Peptide-infused formulas offer smooth glide and slight firming benefits, helping the liner stay intact across fine lines.
Try Absolute New York Glide & Glam Gel Lip Liner in Nude Pink, a long-wear, precision, waterproof lip liner in neutral nude.

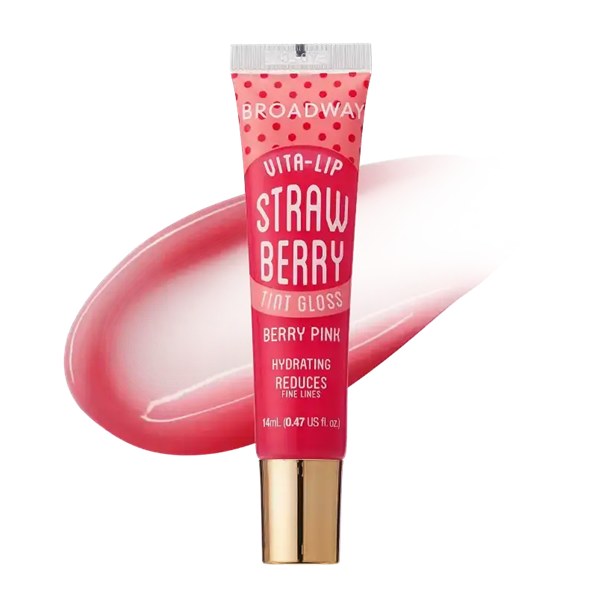
And pair it with a rosehip and coconut oil-infused hydrating lip treatment called the Broadway Vita-Lip Tint Lip Gloss - Strawberry.
Step 2: Target Only the Center Zones
When learning how to overline lips for everyday wear, remember this rule: Only overline where natural shadows fall.
-
Upper Lip: Focus exclusively on the peak of your Cupid’s bow. Overline by no more than half a millimetre, just along the raised outer white edge of your lip border.
-
Lower Lip: Overline slightly only at the absolute center curve of your bottom lip.
The Science of the Vermilion Border
Anatomical studies on perioral tissue highlight the unique structure of the vermilion border, the sharp boundary line where facial skin meets the red mucous membrane of the lips. Because superficial capillary beds sit directly under this transition zone, human vision is hyper-sensitive to micro-distortions across it.
Research in clinical aesthetics shows that even a 1-millimetre misalignment beyond this border triggers an immediate visual signal to observers that the lip border has been altered artificially.
Knowing this anatomical detail reinforces why staying within half a millimetre at the center zones keeps your makeup looking effortlessly real. When you buy beauty products online, choose fine-tipped or micro-slim pencils so you can maintain exact control over this tiny boundary.
Step 3: Taper at the Corners
As you trace away from the central zones toward the outer corners of your mouth, bring your liner directly back onto your true, natural lip line.
Overlining the corners is the primary culprit behind an unnaturally wide mouth or "clowny" appearance. Keeping your outer edges clean and tight creates an oval, lifted focal point right in the center of your face.
Step 4: Map the Cupid's Bow with the X-Method (Optional)
If you struggle with symmetry at the Cupid's bow, use the classic "X-Method":
-
Draw a soft diagonal line starting from the top peak of your left Cupid's bow, extending down toward the right inner lip.
-
Draw a matching diagonal line from the right peak down toward the left inner lip.
-
Use the intersection point as your anchor to softly connect the rest of your upper lip border.
Step 5: Blur and Blend the Edges
Never leave a crisp, hard line on the inner side of your liner. Use a small dense lip brush, a cotton swab, or the pad of your ring finger to smudge the inner border inward toward the center of your lips.
|
Lip Area |
Application & Gradient Technique |
Result / Effect |
|
Outer Edge |
Precise tracing strictly along the vermilion border |
Crisp, natural boundary definition |
|
Inner Edge |
Blurring inward with a finger, swab, or lip brush |
Soft gradient with no hard, harsh lines |
|
Center Zone |
Finishing with lighter lipstick or plumping gloss |
Light reflection for a dimensional 3D pop |
Visual Contrast and Optical Illusion
There is strong perceptual science behind this blending step! Visual psychophysics studies published in cognitive research journals reveal that human perception judges lip volume and attractiveness largely through luminance contrast, the soft transition of light, shade, and contrast between the lips and surrounding skin.
Research shows that creating a soft lightness contrast around the mouth enhances perceived fullness and facial harmony far more effectively than drawing thick, heavy boundaries. Softening your inner edge creates a realistic 3D shadow that tricks the eye into seeing actual volume.
Step 6: Fill and Finish for a 3D Ombré Effect
To complete your lip liner tutorial routine, add your lip color:
-
Base Layer: Apply a matching or slightly lighter satin lipstick across the center of your lips.
-
Highlight: Dab a clear or peptide-infused plumping gloss directly onto the center of your upper and lower lip. The shine reflects light forward, maximizing the optical illusion of volume.
Try this bare rose shade by Ruby Kisses Mood Lipstick - Rose All Day

Or get your hands on the crystal-clear plumping lip gloss, the Kisses Plumping Lip Gloss - Pink Glacier.

Pro-Level Lip Liner Tips for Every Lip Shape
Not all lips are structured the same! Here are tailored lip liner tips to adjust this technique to your unique lip geometry:
|
Lip Shape |
Strategy |
|
Thin Lips |
Micro-overline top & bottom centers; use gloss |
|
Asymmetrical Lips |
Align peaks using X-method; keep corners tight |
|
Flat Cupid's Bow |
Create rounded peaks; smudge inward for soft shadow |
|
Full Lips |
Outline true border; focus on crisp definition |
1. Thin Lips
Focus on light reflection. Use a liner that matches your exact natural lip pigment and apply a high-shine gloss right at the center. Studies evaluating facial harmony show that perceived lip plumpness relies heavily on specular highlight cues.
2. Asymmetrical Lips
Use the center of your nose (philtrum columns) as your visual guide rather than matching the corners. Trace your Cupid's bow first to create balance before moving to the lower lip.
3. Flat or Rounded Cupid's Bow
If your Cupid's bow lacks definition, use the X-method to build soft peaks. Keep the top rounded rather than sharp for a modern, youthful finish.
The Golden Ratio & Facial Harmony
Why does keeping restraint with overlining work so well? Aesthetic medicine studies evaluating facial balance frequently highlight the importance of vertical proportion, often referencing classical geometric harmony where the lower lip presents slightly fuller weight relative to the upper lip (approaching a 1:1.6 aesthetic proportion).
Distorting these natural proportions by overlining the entire mouth artificially alters facial recognition patterns. By strategically overlining only central zones, you honor your natural facial proportions while enhancing overall balance.
Key Takeaways Checklist
Before heading out the door, check your lip makeup against this quick reference guide:
-
Shade Match: Liner is within 1–2 shades of your bare lips.
-
Targeted Zones: Overlined only at Cupid's bow and bottom center by ~0.5 mm.
-
Tight Corners: Liner returns strictly to your natural lip line at the corners.
-
Blended Inner Boundary: No hard inner lines remaining; soft gradient applied.
-
Dimensional Center: Lighter lipstick or gloss focused on the center for light reflection.
Upgrade Your Beauty Routine with Beauty Depot Online
Mastering the art of soft, natural overlining comes down to practice, patience, and quality formulas. Smooth, tug-free pencils let you trace precise micro-lines without feathering or bleeding all day.
Ready to build your ultimate lip kit? When you're ready to buy beauty products online, explore Beauty Depot Online to discover our wide range of long-wear liners, satin lipsticks, and nourishing peptide glosses.