
Makeup For Face Shape - Do Contour And Highlight Like A Pro
The Ultimate Beauty Depot Online Guide to Sculpting, Balancing, and Defining Your Features.
Have you ever followed a viral makeup tutorial step-by-step, only to look in the mirror and feel like something was... off? You used the exact same products, the same luxury brushes, and the same techniques as your favorite beauty influencer. Yet, instead of looking sculpted and radiant, your makeup looked patchy, heavy, or completely changed your natural expressions.
The missing piece of the puzzle isn't your skill level or your products. It’s your face shape.
In the world of professional artistry, there is no such thing as a one-size-fits-all makeup routine. The secret to a flawless look lies in understanding makeup for face shape. Contouring and highlighting are essentially visual illusions. By mastering the placement of light and shadow, you can harmonize your features, soften sharp angles, or add structure to soft curves.
Whether you want to soften a strong jawline, elongate a round face, or give an oval face an editorial lift, Beauty Depot Online will break down everything you need to know about custom contouring and strategic highlight placement.
The Light and Shadow - Why Face Shape Matters
Before we dive into the specific face shapes, let’s look at the underlying principles of facial sculpting. Contouring and highlighting work by manipulating how light bounces off the planes of your face.
-
Contour Creates Shadows - When you use a cool-toned, matte contour product, you are simulating a physical shadow. This allows you to visually push back areas of the face, making them appear slimmer, deeper, or more recessed.
-
Highlight Brings Features Forward - When you use a light-toned concealer or a shimmering powder, you are drawing light toward that area. This makes features look more prominent, lifted, volume-filled, and awake.
Historically, classical art and traditional beauty standards pointed to the oval face shape as the ideal, symmetrical baseline. Traditional contouring aimed to make every other face shape look more oval.
However, modern beauty is all about celebrating your unique structure. Today, we don't contour to hide who we are; we contour to optimize our natural bone structure, bring balance to our proportions, and ensure our makeup looks seamless in every lighting condition, from harsh office fluorescent bulbs to the golden hour sun. If you are a beginner and want to know everything about makeup, we have a complete makeup guide for you.
Choosing Your Medium - Cream vs. Powder Contour
Before grabbing your tools, you need to decide which formulation matches your skin type, skill level, and desired finish.
|
Formulation |
Best For |
Finish |
Pros |
Cons |
|
Cream / Liquid |
Dry, normal, or mature skin types; everyday natural looks. |
Dewy, skin-like, seamless. |
Blends effortlessly; looks like a natural shadow; melts into the skin. |
Requires setting with powder if you are oily; it can slide if not applied correctly. |
|
Powder |
Oily, combination skin types; high-glam or photography makeup. |
Matte, structured, airbrushed. |
Excellent staying power; easy to control intensity; great for precise lines. |
Can look cakey on dry skin; requires a light hand to avoid looking muddy. |
Pro Tool Selection
-
For Creams - Use a damp beauty sponge or a dense, synthetic buffing brush to melt the product into your foundation.
-
For Powders - Opt for an angled powder brush for the cheeks and jawline, and a small, fluffy blending brush for precision nose contouring. Need a perfect powder brush? Get this Nicka K’s Powder Brush.

How to Determine Your True Face Shape
To find your perfect contour by face shape strategy, you first need to accurately identify your structure. Pull your hair completely back into a ponytail, look straight into a well-lit mirror, and evaluate these three markers:
-
The Widest Part of Your Face - Is it your forehead, your cheekbones, or your jawline? Or are they all equal?
-
The Face Length vs. Width Ratio - Is your face visibly longer than it is wide, or are the vertical and horizontal measurements nearly identical?
-
The Sharpness of Your Features - Is your jawline softly rounded, pointed, or distinctly angular and square?
Let's break down the five primary face shapes and look at the exact blueprints for each one.
The Oval Face Shape - Balanced & Symmetrical
-
Light contour at temples
-
Highlight the center of the forehead & under the eyes
-
Contour hollows of cheeks (stop mid-cheek)
-
Soft highlight on the chin
Characteristics
The oval face is slightly longer than it is wide, with the forehead being just a bit wider than the jawline. The angles are softly rounded without prominent, sharp points. Because this shape is inherently balanced, your goal isn't to alter your shape, but rather to add depth and accentuate your natural symmetry. Oval face shape is one of the most historically balanced facial features.
Step-by-Step Contour by Face Shape Strategy
-
Temples - Dip into your matte contour cream or powder. Lightly sweep the product onto your temples, moving upward and backward into the hairline. This frames the top portion of your face.
-
Cheekbones - Find the hollows of your cheeks by feeling for the space just beneath your cheekbone. Start at the top of the ear and trace the contour downward, stopping precisely halfway across your cheek.
Crucial Mistake to Avoid - Do not bring your cheekbone contour too close to your mouth or the corners of your lips. Dragging this line down too far pulls your entire expression downward, making you look tired or aged.
Expert Highlight Placement
-
The Center Axis - Because your face is already well-proportioned, draw light down the center line. Apply a brightening concealer to the middle of your forehead, the bridge of your nose, and your Cupid’s bow.
-
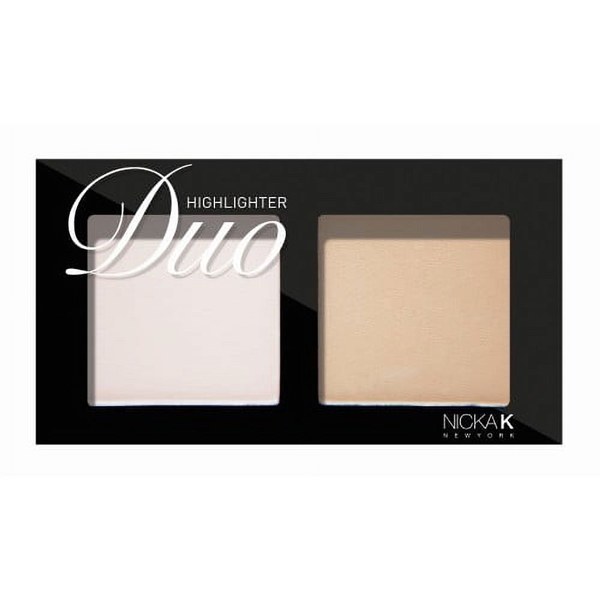
The Bright Under-Eye - Sweeping highlight in an inverted triangle under the eyes lifts the cheekbones even further. For a more professional touch, Nicka K’s Duo Highlighter is all you need.
The Round Face Shape - Soft Curves & Equal Proportions
-
Contour the sides of the temples
-
Sharp contour in cheek hollows (angled down)
-
Contour along the entire jawline to slim
Characteristics
Round faces feature nearly equal length and width. The cheeks are typically the widest part of the face, accompanied by a soft, curved jawline and a rounded hairline. The primary objective here is to introduce angles, structure, and the illusion of vertical length.
Step-by-Step Contour by Face Shape Strategy
-
The Perimeter - Apply your contour product along the sides of your temples and down onto the sides of your forehead. This visually narrows the upper face.
-
The Sculpted Cheek - To cut through the fullness of the cheeks, apply your contour in the hollows. Instead of sweeping straight across, angle your contour downward toward the corners of your mouth. This steep angle creates a sharper, more lifted illusion.
-
The Jawline Definer - Run your contour brush along the entire edge of your jawline, blending the product downward onto your neck. This hides any soft edges and carves out a crisp, geometric shadow line.
Expert Highlight Placement
To pull the eye vertically and counteract the roundness, focus your highlight placement entirely on the internal vertical axis:
-
An elongated vertical diamond at the center of your forehead.
-
A thin, precise line straight down the bridge of your nose.
-
A strong, concentrated dot on the very center of your chin to pull it downward visually.
The Square Face Shape - Strong, Chiseled Angles
-
Contour the outer corners of the hairline
-
Soft shading under cheekbones
-
Heavy contour at the sharp jaw angles
Characteristics
Square faces boast beautiful, strong bone structure. The forehead, cheekbones, and jawline are almost exactly equal in width, and the jawline is notably sharp, square, and angular. The goal for a square face is to gently soften these harsh edges and introduce a touch of curvature and fluid motion to the perimeter.
Step-by-Step Contour by Face Shape Strategy
-
Hairline Corners - Focus your contour product heavily on the upper outer corners of your hairline. By shading these corners, you round out a boxy forehead line.
-
The Jaw Angles - Find the widest, sharpest points of your jawbone near your ears. Apply contour directly onto these bony angles and blend inward and downward. This rounds out the sharpest points of your lower face.
-
Soft Cheek Shading - Keep the cheekbone contour exceptionally soft and slightly rounded, rather than a harsh, straight line.
Expert Highlight Placement
To draw attention away from the outer angles, bring the focus inward to the soft center of the face:
-
Sweep highlight in a soft circle in the middle of your forehead.
-
Add a touch of highlight to the center of your chin.
-
Apply a reflective, luminous highlighter to the highest tops of your cheekbones to mimic natural, youthful volume.
The Heart Face Shape - Dramatic Cheekbones & Delicate Chin
-
Heavy contour on the wide temples/sides of the forehead
-
Contour the hollows of the cheeks
-
Avoid contouring the chin!
-
Brighten the sides of the jaw & the center of the chin
Characteristics
Heart-shaped faces feature a wide forehead and prominent, stunning cheekbones that taper down into a narrow, pointed chin. The upper half of the face holds the visual weight, so your goal is to minimize the width of the forehead while widening and balancing the lower half of the face.
Step-by-Step Contour by Face Shape Strategy
-
Temples and Forehead Sides - Apply your contour product heavily along the sides of your forehead and deep into the temples. This creates a shadow that narrows the widest upper third of your face.
-
Cheekbones - Shade the hollows of your cheekbones, starting from the top of the ear. Keep this line short and focused near the back of the cheek to avoid making the lower face look even narrower.
-
Skip the Jawline - Do not contour your jawline or chin. Adding shadow here will make your chin look sharper and pointier, throwing off your facial proportions.
Expert Highlight Placement
-
The Chin Expansion - Apply a generous amount of matte brightening concealer to your chin. Making this area look wider balances the prominent forehead.
-
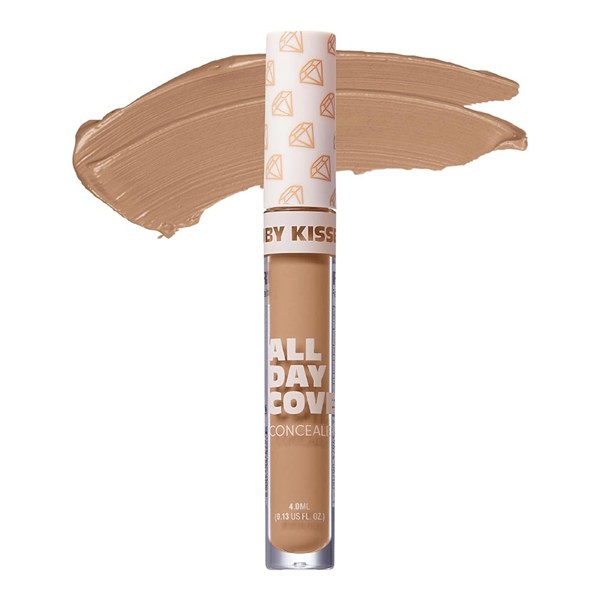
The Lower Jawline - Sweep light highlight along the sides of your lower jawline (the area between your cheek contour and your chin). This adds artificial fullness to the narrowest section of your face. We have a range of matte concealers in stock, and one of the best is Kiss All Day Cover Concealer.
The Long (Oblong) Face Shape - Elegant Vertical Lines
-
Heavy contour across the top hairline to shorten
-
Horizontal highlight on temples & cheeks
-
Heavy contour across the bottom of the chin to shorten
Characteristics
Long (or oblong) faces are distinctly longer than they are wide. They often feature a high, prominent forehead, elongated cheeks, and a long, graceful chin line. The goal for this face shape is to break up the vertical length, minimize the forehead and chin, and draw the eyes horizontally to create the illusion of width.
Step-by-Step Contour by Face Shape Strategy
-
The Top Hairline - Blend your contour product heavily across the very top of your hairline, moving downward. This lowers the visual starting line of your face, shortening the forehead.
-
The Bottom of the Chin - Sweep contour directly across the very bottom of your chin and up slightly onto the tip. This acts as a visual stopper, cutting off the length of the lower face.
-
Horizontal Cheeks - When contouring your cheekbones, draw a slightly more horizontal line rather than an angled one. This pulls the eye outward toward your ears, adding artificial width.
Expert Highlight Placement
Avoid applying long, vertical lines of highlight down the center of your face, as this will only lengthen it further. Instead, focus on horizontal highlight placement:
-
Apply highlight to your temples and the tops of your cheekbones, extending toward the hairline.
-
Keep the under-eye highlight wide and fanned out toward the sides of your face.
Pro Artist Techniques for Flawless Execution
Knowing where to place your products is only half the battle. To achieve an effortlessly blended look that stands up to close inspection, integrate these professional steps into your routine:
1. The Underpainting Method
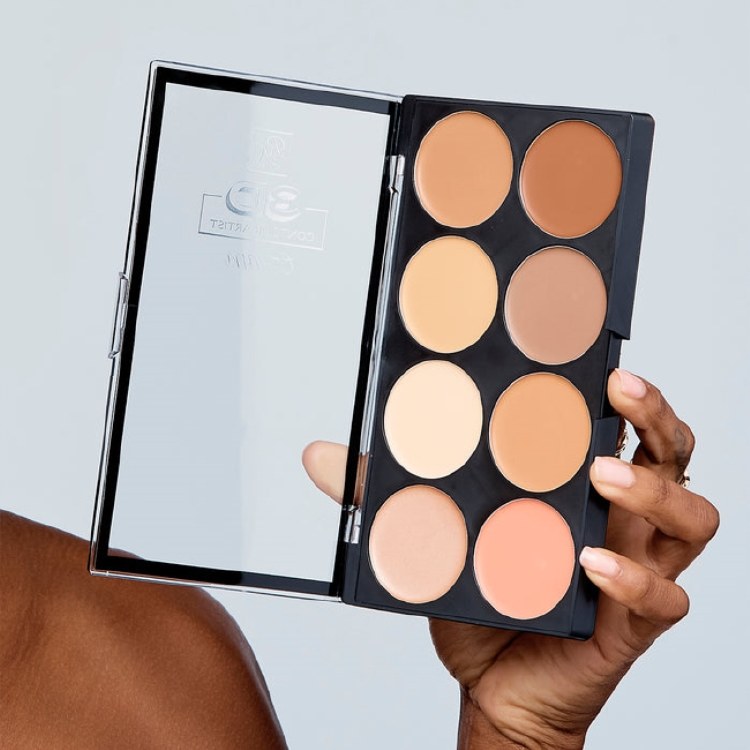
If you struggle with harsh lines, try underpainting. Apply your cream contour and brightening highlight directly onto your primed skin before applying foundation. Next, take a damp beauty sponge loaded with a lightweight foundation (such as a skin tint) and tap it gently over the contour. The shadow and light will radiate beautifully through your foundation, completely eliminating harsh, unblended edges. You can get this Ruby Kisses 3D Contour Artist Cream Makeup Palette from Beauty Depot Online to do your underpainting right.
2. Match Your Undertones
A common mistake is using a warm, orange-toned bronzer as a contour. Bronzer is designed to mimic a sun tan and should be placed where the sun naturally hits. Contour, however, must mimic a cold shadow.
-
Cool/Fair Skin - Look for greyish-brown or taupe contour shades.
-
Warm/Olive Skin - Look for rich, neutral browns with golden or olivaceous depths.
-
Deep Skin - Look for deep espresso shades with cool, blue, or neutral undertones to prevent the skin from looking ash-gray or muddy.
3. The Two-Tone Highlight Rule
For the ultimate red-carpet finish, divide your highlight into two steps:
-
Matte Highlight - Use a liquid concealer that is 1–2 shades lighter than your foundation to map out the facial volumes described above. This corrects the color and alters the structure.
-
Luminous Highlight - Finish your look by applying a reflective shimmer powder or balm only to the absolute highest points of bone structure (the tip of the nose, brow bone, and top edge of cheekbones). Keep shimmer away from areas with texture, large pores, or fine lines.
Common Contouring Mistakes & How to Fix Them
Even experienced makeup lovers run into roadblocks. If your makeup isn't turning out exactly right, check if you're making one of these three common errors:
-
The Muddy Look - This happens when you apply too much product or blend it over too wide an area. If your contour looks dirty, take the foundation brush or sponge you used previously (without adding more product) and lightly tap over the edges of your contour to diffuse the shadow back into place.
-
The Drooping Face - If your cheek contour is placed too low, it pulls your face down. A quick fix is to take a translucent setting powder or a matte brightening powder on a flat makeup puff and stamp a crisp line directly underneath your cheek contour. Let it sit for two minutes, then sweep it away to instantly raise your cheekbones.
-
The Harsh Lighting Line - Always check your profile in a side mirror before leaving the house. Ensure your jawline contour is blended down onto your neck so there is no obvious mask effect.
Upgrade Your Look with Premium Beauty Tools
Now that you possess the technical blueprints for custom facial sculpting, you need the right professional tools to achieve a seamless finish. The highest quality cream contour formulas require dense, synthetic fibers that won't absorb excess product, while fine-milled powders need soft, tapered brushes for featherlight distribution.
Explore our curated selection of professional contour kits, high-definition concealers, and luxury blending brushes at Beauty Depot Online to find the perfect matches for your skin tone and routine.
For more expert tutorials on base preparation, read our comprehensive guide on How to Choose the Perfect Foundation for Your Skin Type to ensure your contour sits on a flawless, long-lasting canvas. To learn more about the fascinating science behind light reflection and cosmetics formulation, check out the in-depth industry analysis on Cosmetics Formulations.
No matter your face shape, be it a classic oval, a striking square, a balanced heart, an elegant oblong, or a soft round structure, remember that makeup is an art form designed for experimentation. Use these rules as a foundational guide, play with your products, and discover the look that makes you feel the most confident!